This guide describes the day-to-day administration of a Caelum appliance (NAS storage with S3 tiering, NAS auditing and migration), published by GaLiLo. It presents each screen of the administration console (version 0.65.5) and refers, for detailed procedures, to the tasks guide and the replication guide.
To install a new appliance from the ISO, see the installation guide.
The console is a web application served over HTTPS, reachable at the appliance address (https://<appliance-ip>). It opens in English by default; the EN / FR selector in the top bar switches the language, next to the notifications bell, the light/dark theme button and the menu of the signed-in account. A Search screens… field at the top of the sidebar finds a screen by name or keyword ("AD" leads to Identities, for example). The sidebar is organized into six groups:
- Overview — dashboard, AI assistant
- Storage — pools, volumes, shares, snapshots, replication, high availability, iSCSI
- Archiving — policies, archiving tasks, cloud destinations, cost, migration
- Access — identities (AD/LDAP), activity trail, governance (ACL), content analysis, external audits, duplicates, data exploration
- Diagnostics — performance, logs, support
- Settings — accounts, security, network, TLS, updates, license, advanced settings, maintenance
Since 0.65, https://<appliance-ip>/ serves this new console. The previous interface remains available at https://<appliance-ip>/legacy; a few actions are still done there (creating replication jobs, see Replication).
Table of contents#
1. Overview#
Dashboard#
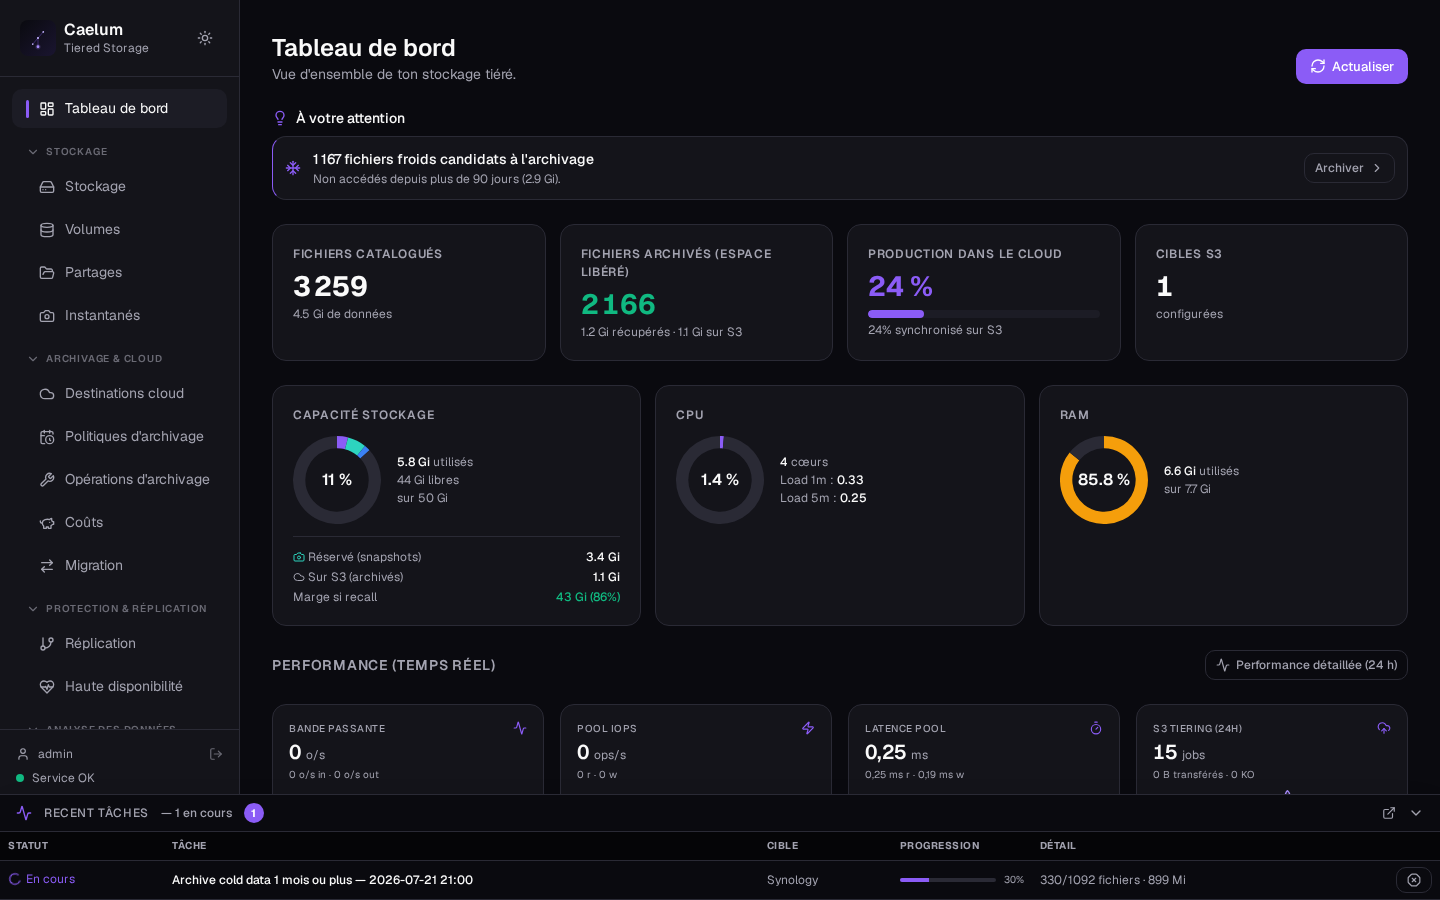
After authentication (administrator login and password, then a TOTP code if two-factor authentication is enabled), the Dashboard shows the overall state: number of pools, volumes, shares, catalogued files and S3 destinations, pool capacity (with the share tiered to S3), S3 cache archiving, storage trend (local and tiered) and recent activity. A badge at the top right shows System healthy, System degraded (pool offline, archived-file protection failing, catalogue lagging) or Health unknown.
AI assistant#
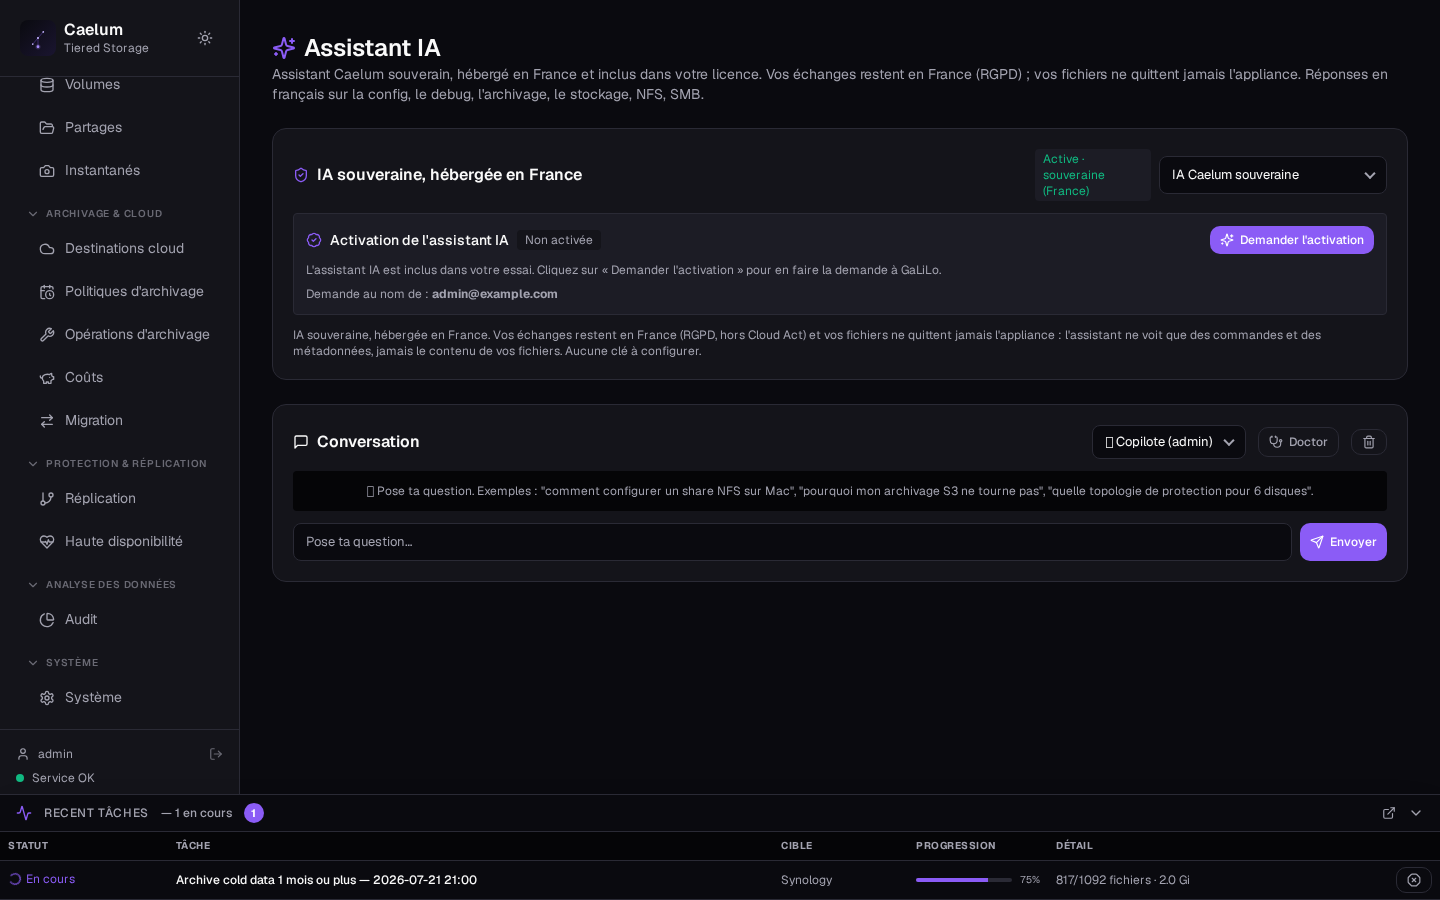
The AI assistant has its entry under Overview and a permanent shortcut at the bottom of the sidebar. Ask your questions about the appliance; any change it proposes is shown in Confirm the proposed actions and is only executed after Approve.
There are two modes. Both are disabled by default and require explicit activation by the administrator. The first uses a Mistral key provided by GaLiLo, kept in particular for proofs of concept: once that mode is activated, content sent to the assistant is transmitted to Mistral AI. The second is BYOK: the administrator provides their own key to an OpenAI-compatible endpoint (for example Mistral, OVH AI Endpoints or a local Ollama). The key is stored encrypted and is not logged. The BYOK screen is planned for release 0.65.10; it is not delivered in the version described here. The website does not process this content.
Activation of the GaLiLo key mode is not automatic: in Settings → Advanced settings → Assistant settings, the Request activation button sends a request that GaLiLo approves. A linked support account is required (see Logs and support).
2. Storage#
Pools#
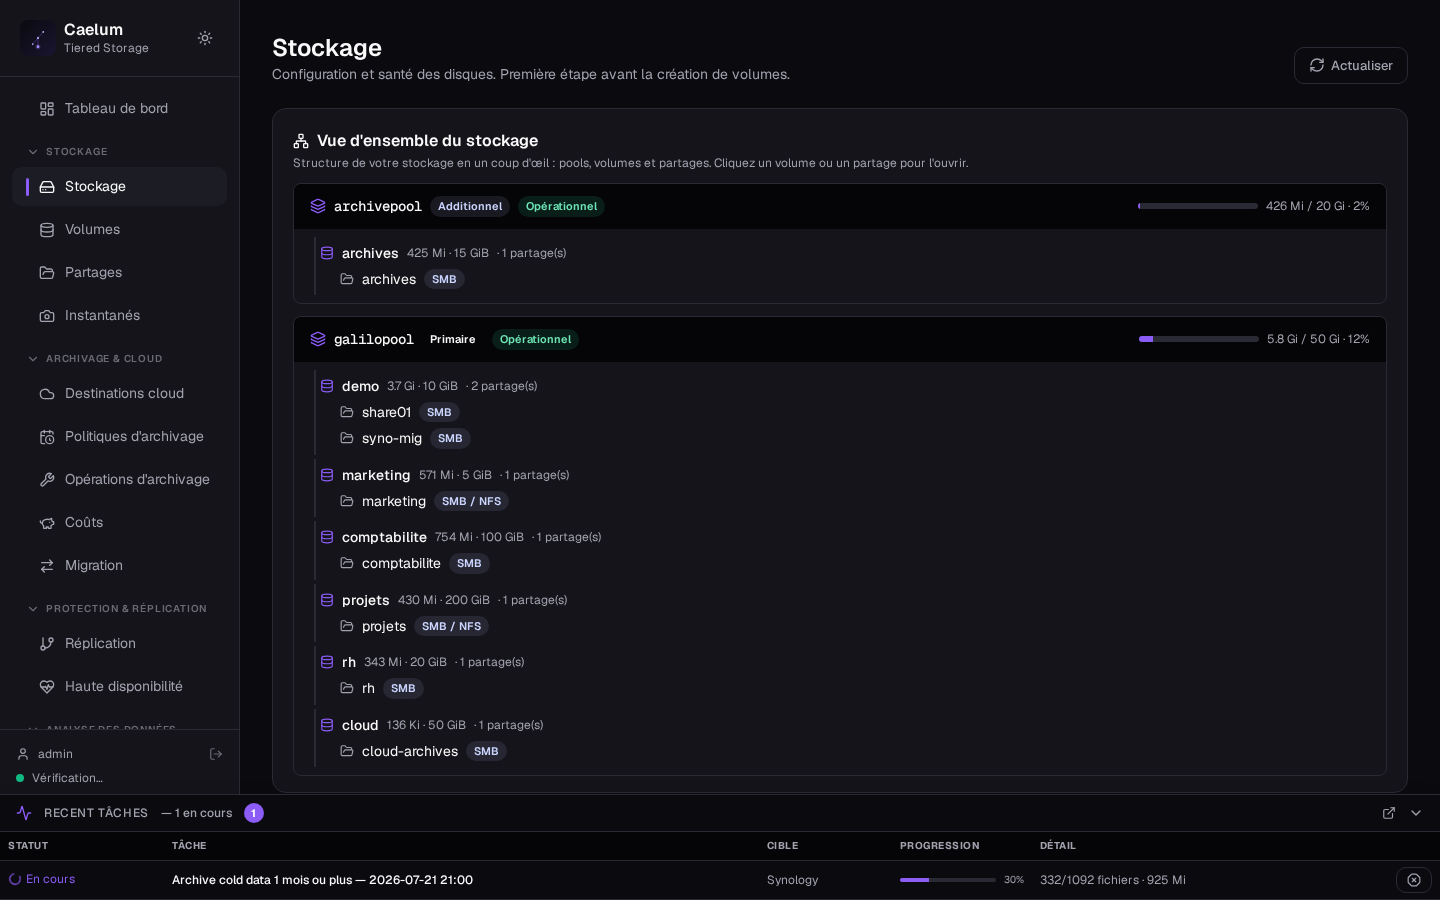
The Pools screen presents the appliance's ZFS pools: state, capacity, free space, fragmentation, snapshot usage, disks and SMART health.
- The primary pool (
galilopool) hosts the volumes exposed under/galilo/data. - Additional pools can be created (mounted under
/galilo/pools/<name>) to place certain volumes on separate storage.
To create a pool: New pool → name → layout (No redundancy, Mirror, RAIDZ1/2/3) → disks. The pool is created on the disks' stable identifier (WWN or serial number), never on their /dev/sdX name. The screen also offers Add disks to a pool, Import a foreign pool, Replace a disk (rebuild without service interruption), Clear errors, Export and Destroy the pool.
Pool verification (scrub) is automatic: every 30 days, within an adjustable night window (01:00–06:00 by default), one pool at a time. The last result is shown on the screen.
A pool's topology (mirror ↔ RAIDZ) is fixed at creation. A topology migration is only possible with the support team. Size it at deployment time.
Additional pools are outside high availability: their volumes are standalone and do not follow an HA failover.
Volumes#
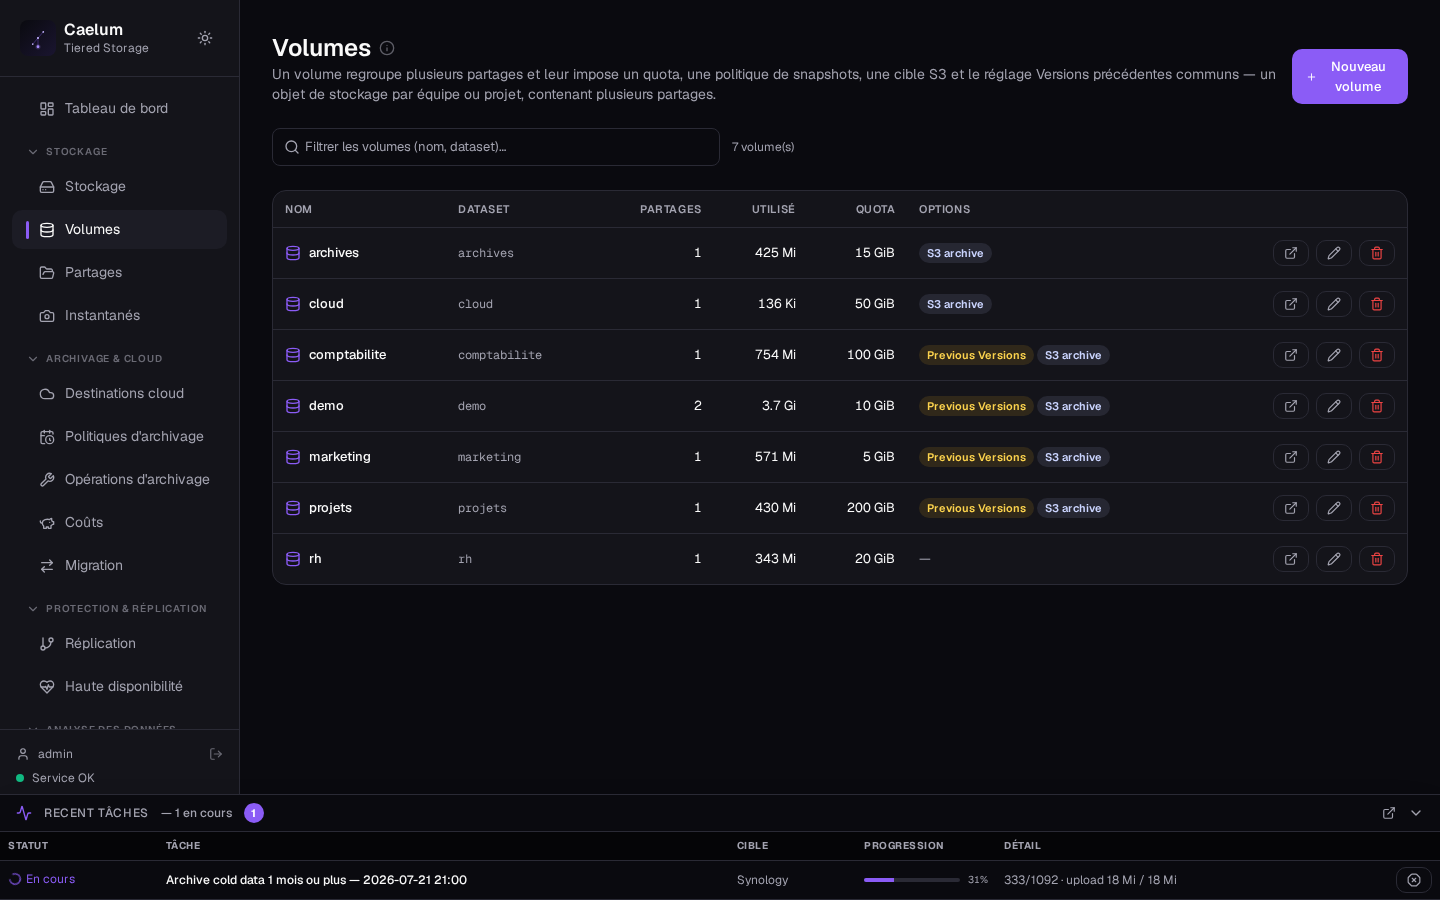
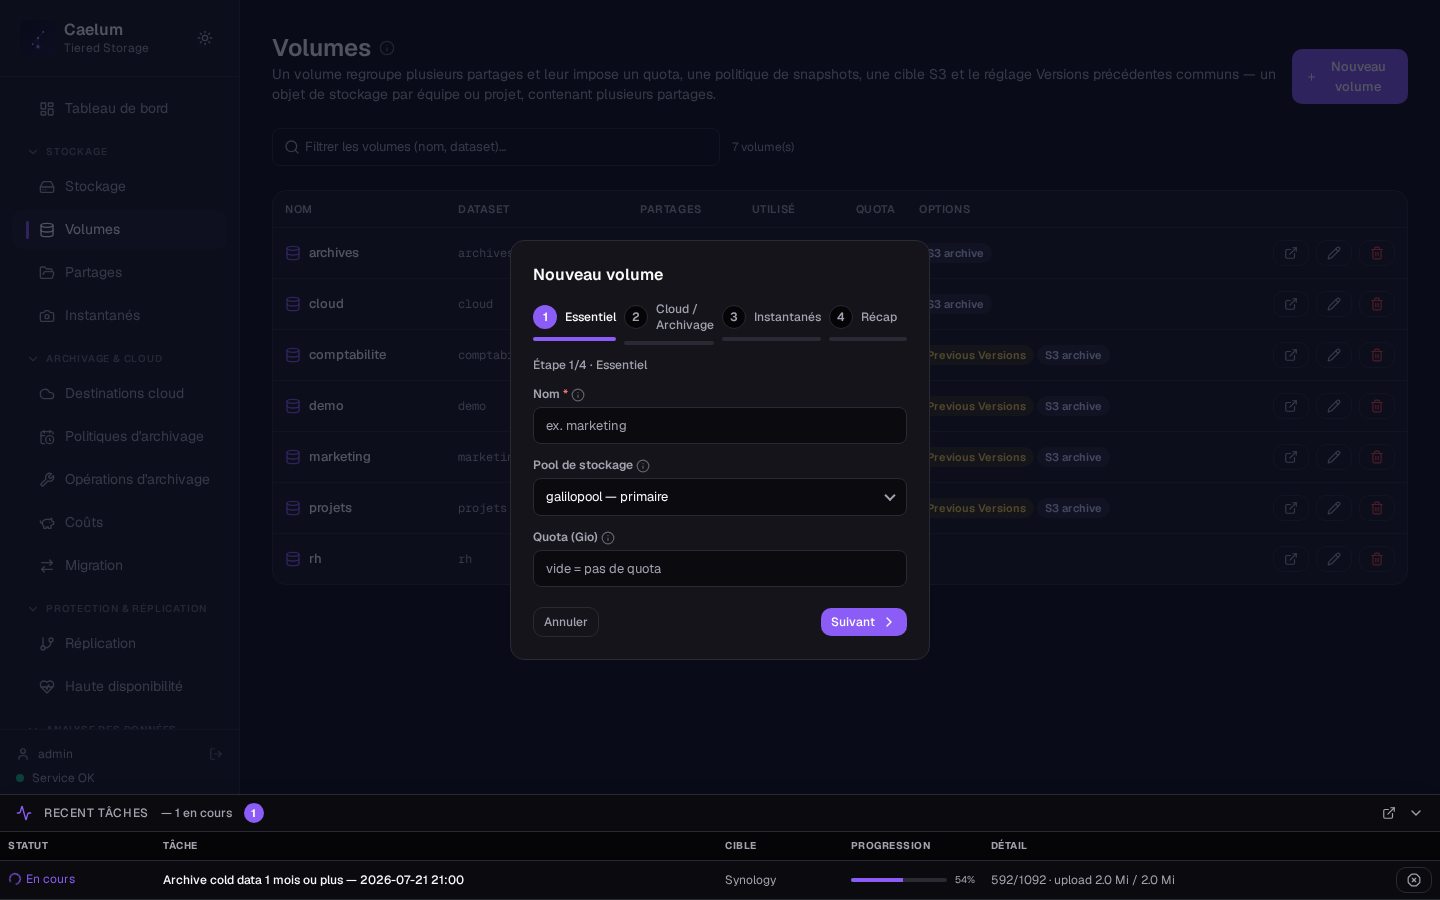
A Volume is a ZFS dataset that hosts one or more Shares. It carries the settings common to all its shares: quota, default archiving destination, cloud retention and "Previous Versions". You typically create one volume per team or per project.
Click New volume. The window asks for:
- Name: lowercase, alphanumeric, hyphen, underscore (used as the dataset name).
- Pool: target pool (primary by default, or an additional pool).
- Quota (GiB): maximum size of the volume and its shares. Empty = no quota.
- Default archiving destination (optional): cloud destination inherited by the volume's shares that do not pick one.
- Previous versions (Windows): see the dedicated section.
- Archiving — advanced settings: cloud retention (30 days by default; how long files deleted on the share side are kept in S3 — empty = never purged), bucket and prefix specific to the volume.
After confirmation, the volume appears with its pool, usage, number of shares and S3 target. A row opens the volume detail (usage, shares, snapshots, S3 metadata and tags, cloud offload rule). The row icons let you take a snapshot now, edit or delete the volume.
SMB / NFS shares#
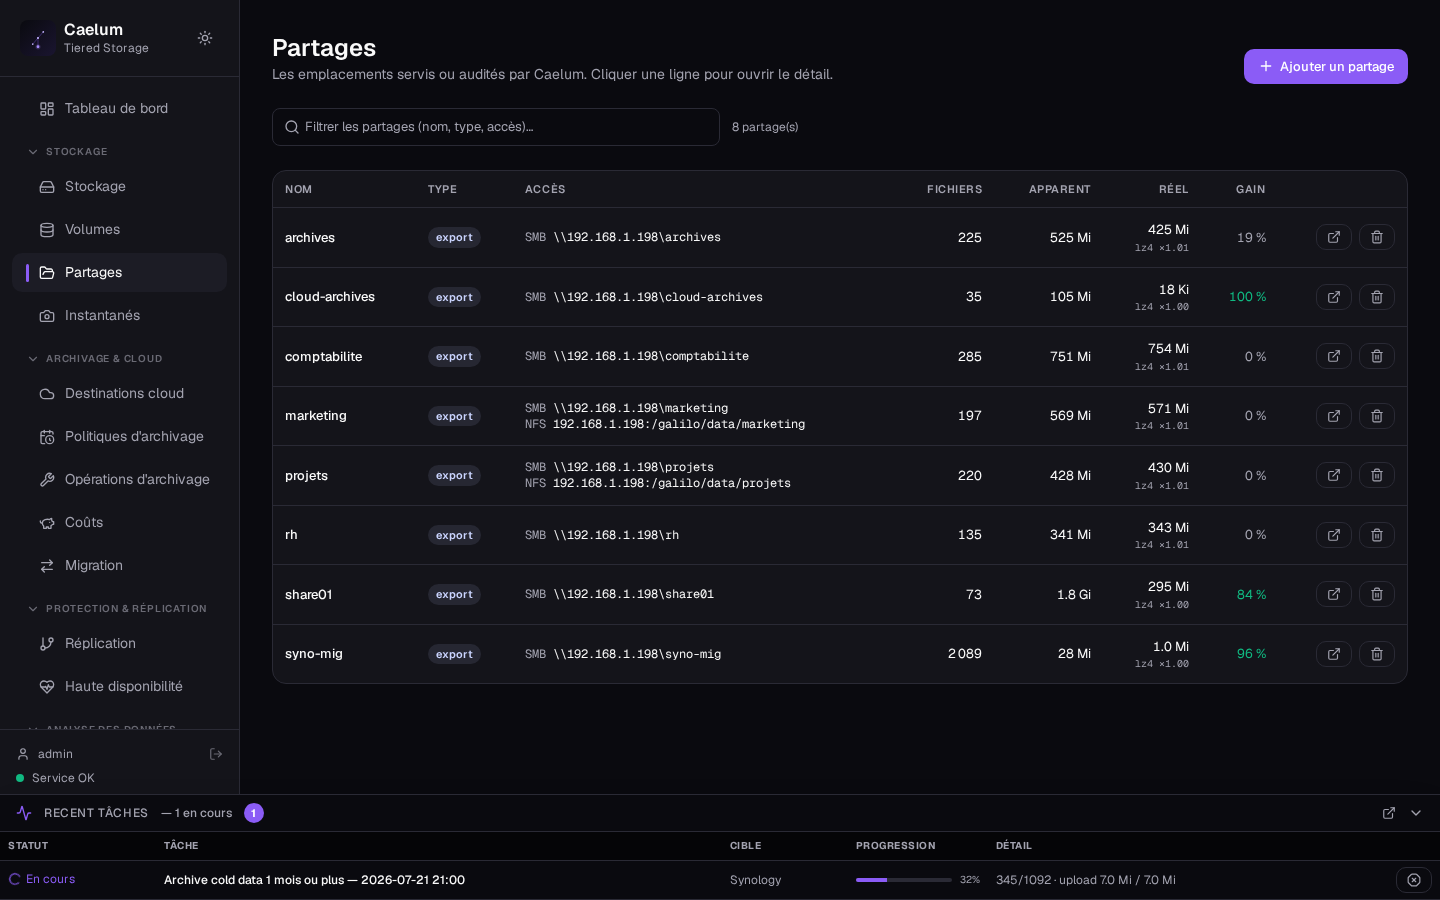
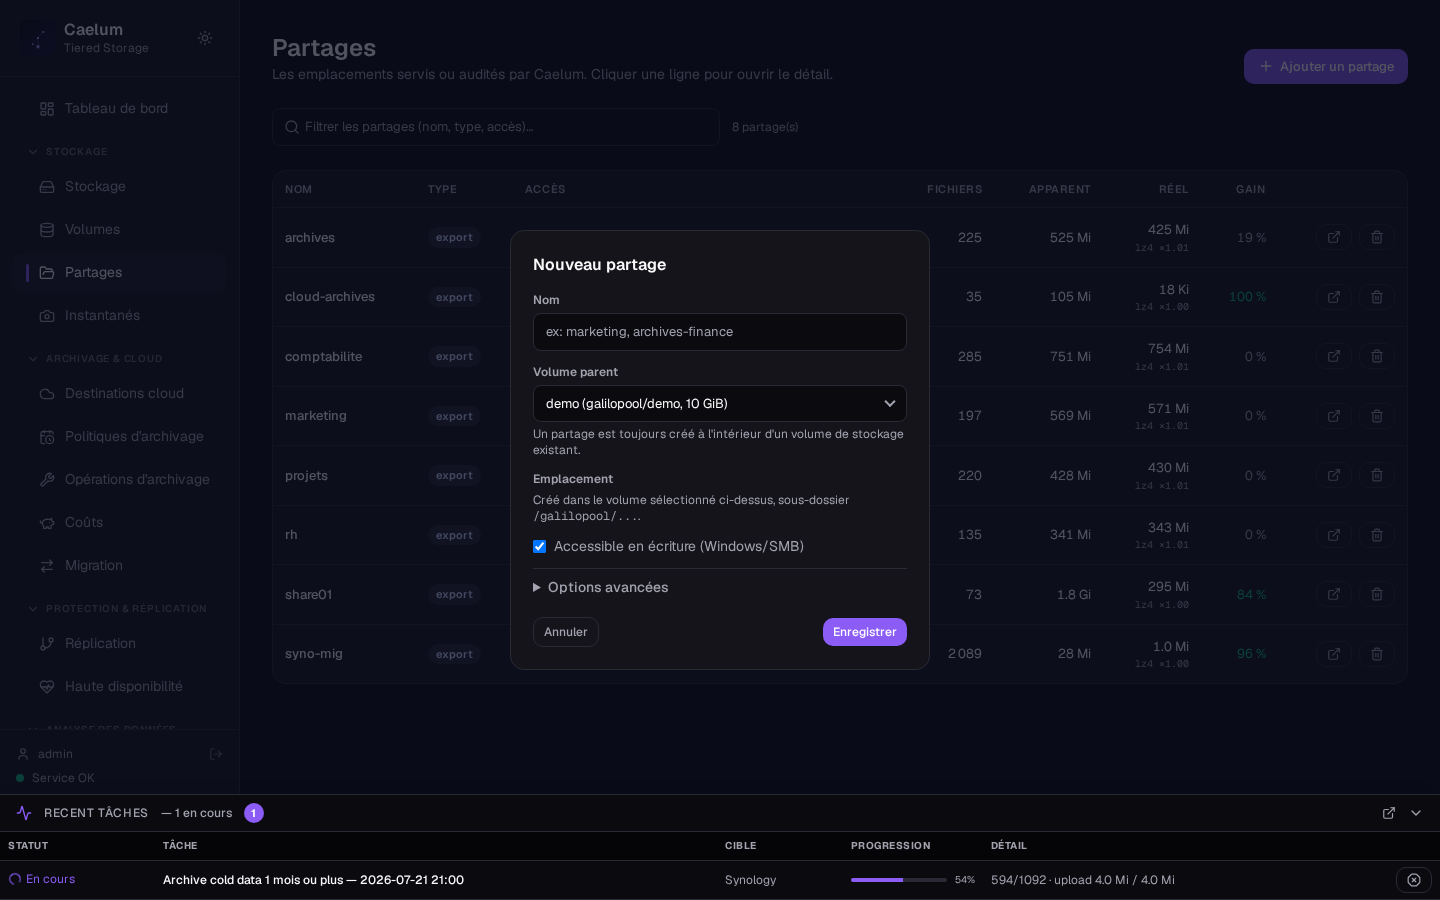
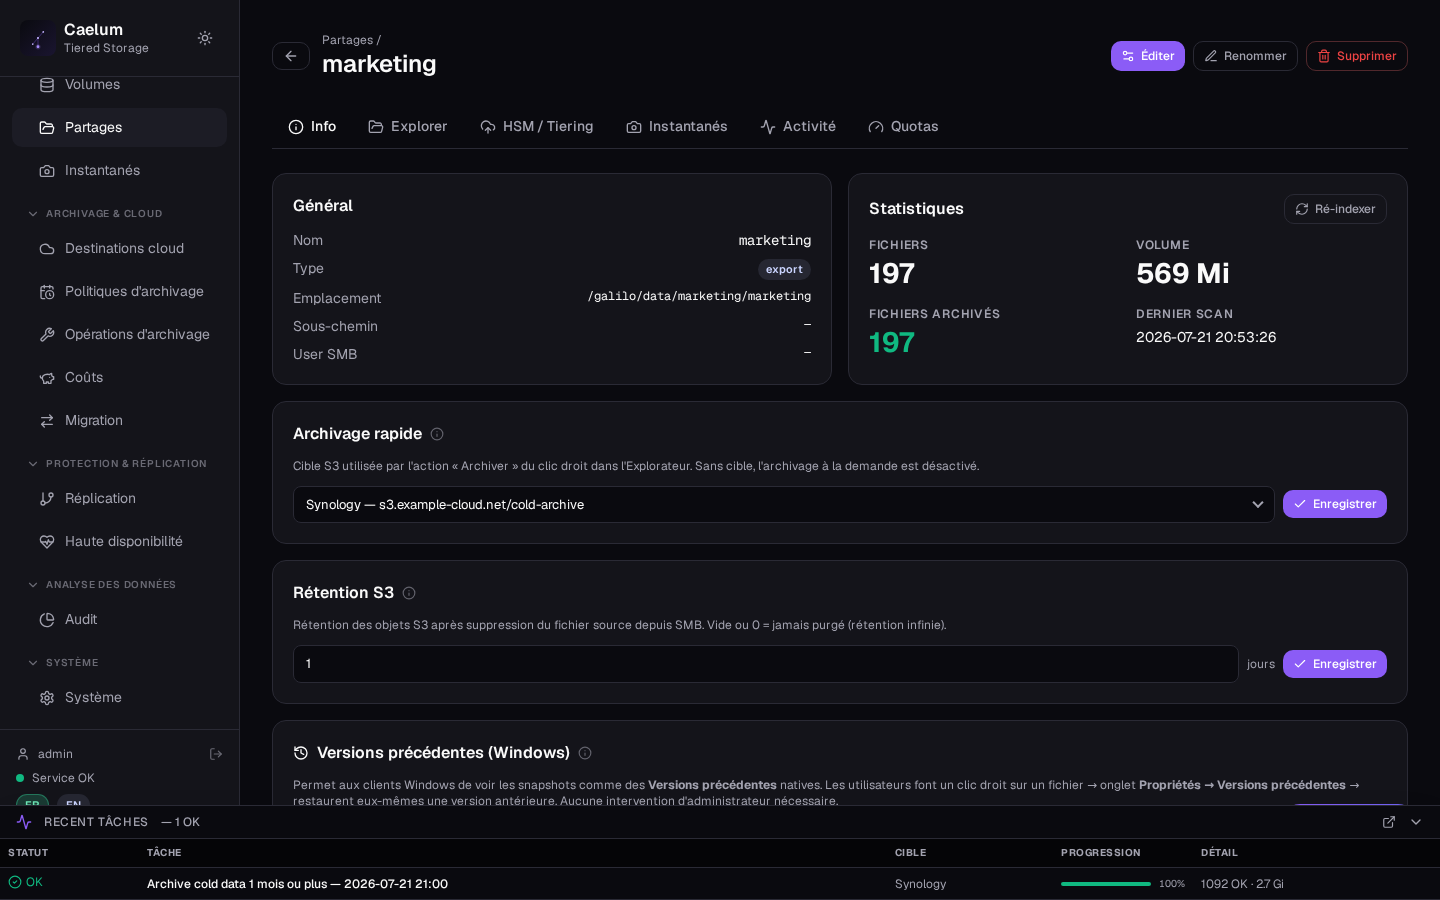
A Share is the location actually served to clients via SMB and/or NFS. It belongs to a volume and corresponds to a subfolder of its dataset.
In Shares, click New share. The window offers:
- Share name and Volume: the name becomes the SMB path
\\<appliance-ip>\<name>; the dataset path is derived from the volume. - Quota specific to the share (GiB, empty = none).
- SMB and/or NFS; for NFS, the allowed NFS clients and the NFS identity (squash: everyone mapped to the service account, the default; sys: IDs announced by the client).
- Read only and Share enabled (disabling removes the share without deleting it).
- Cloud tiering (S3 cache): automatic archiving, S3 destination (inherited from the volume by default) and local cache threshold.
- Access & security: allowed accounts / groups (
g:group,u:user). Empty = local accounts; if the appliance is joined to a domain, domain users have access by default.
The list shows for each share its path, protocols, S3 tiering state, quota and state (Online, or Not served with the reason). Clicking a row opens its detail: Configuration, S3 cache, File browser (with audio/video playback of archived files and file upload), Previous versions, User quotas, Per-user NTFS permissions, Bulk actions, ZFS properties and file diagnosis. The Edit, Reindex the catalogue and Delete buttons are at the top of the page.
Deleting a share removes it from the SMB/NFS configuration; if objects from the share are archived on S3, their number is shown before confirmation.
Advanced SMB options per share#
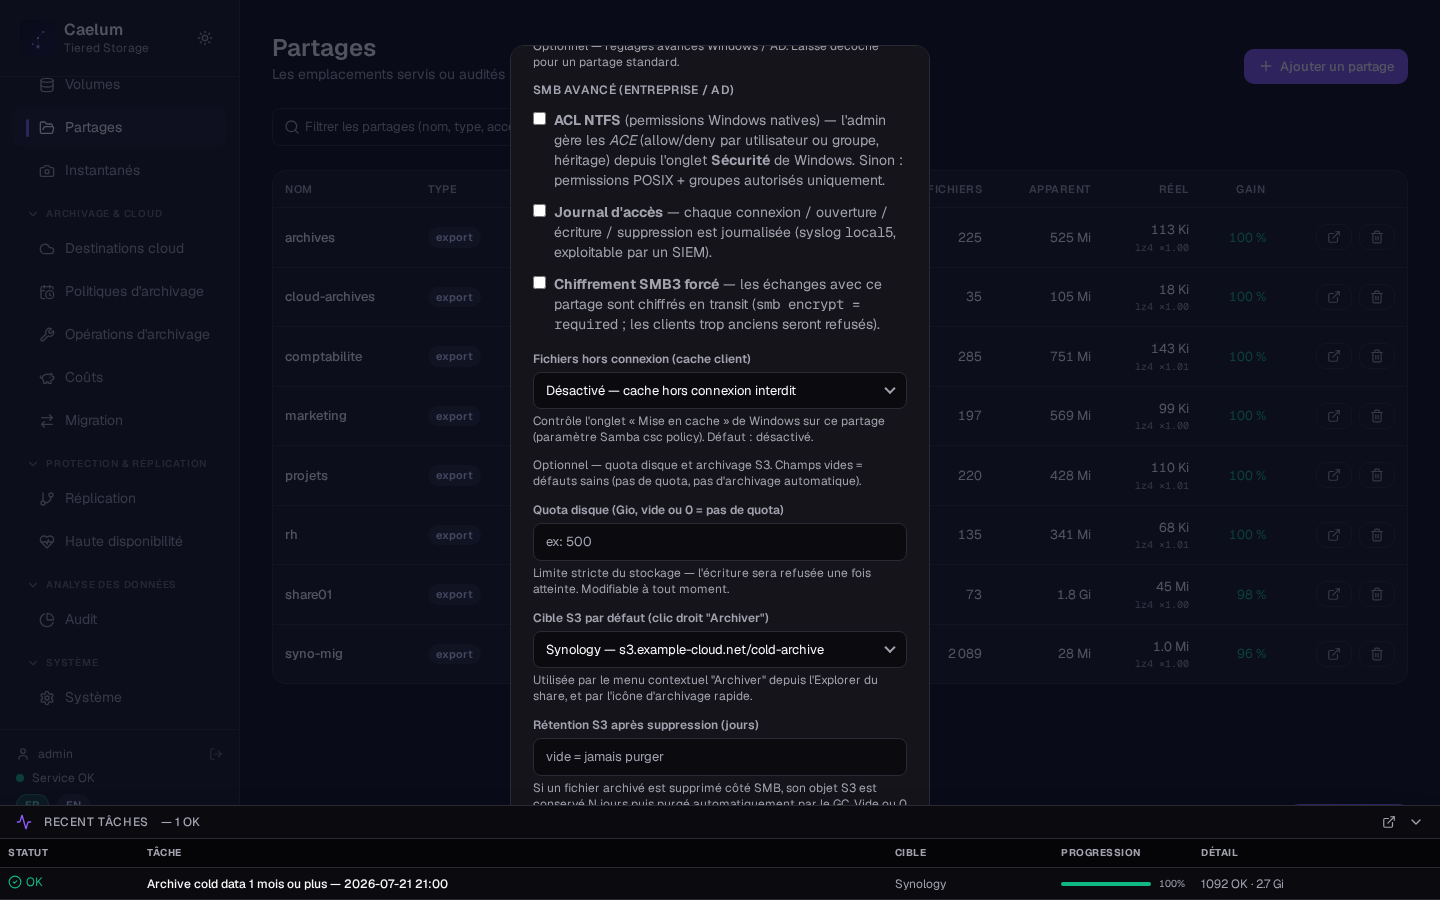
For enterprise (AD) environments, the Access & security section of each share offers:
- NTFS ACLs: native Windows permissions, set from the Explorer Security tab and applied per user, over SMB and NFS. On a domain-joined appliance, the option is checked by default.
- Access-Based Enumeration: hides the folders the user cannot access (available only when NTFS ACLs are actually applied).
- Hide the share: share invisible when browsing the network (
browseable = no), reachable by its exact path. - Log accesses: feeds the SMB Activity trail (SIEM export possible).
- SMB encryption required: enforces encrypted SMB3 for the share's clients.
Snapshots#
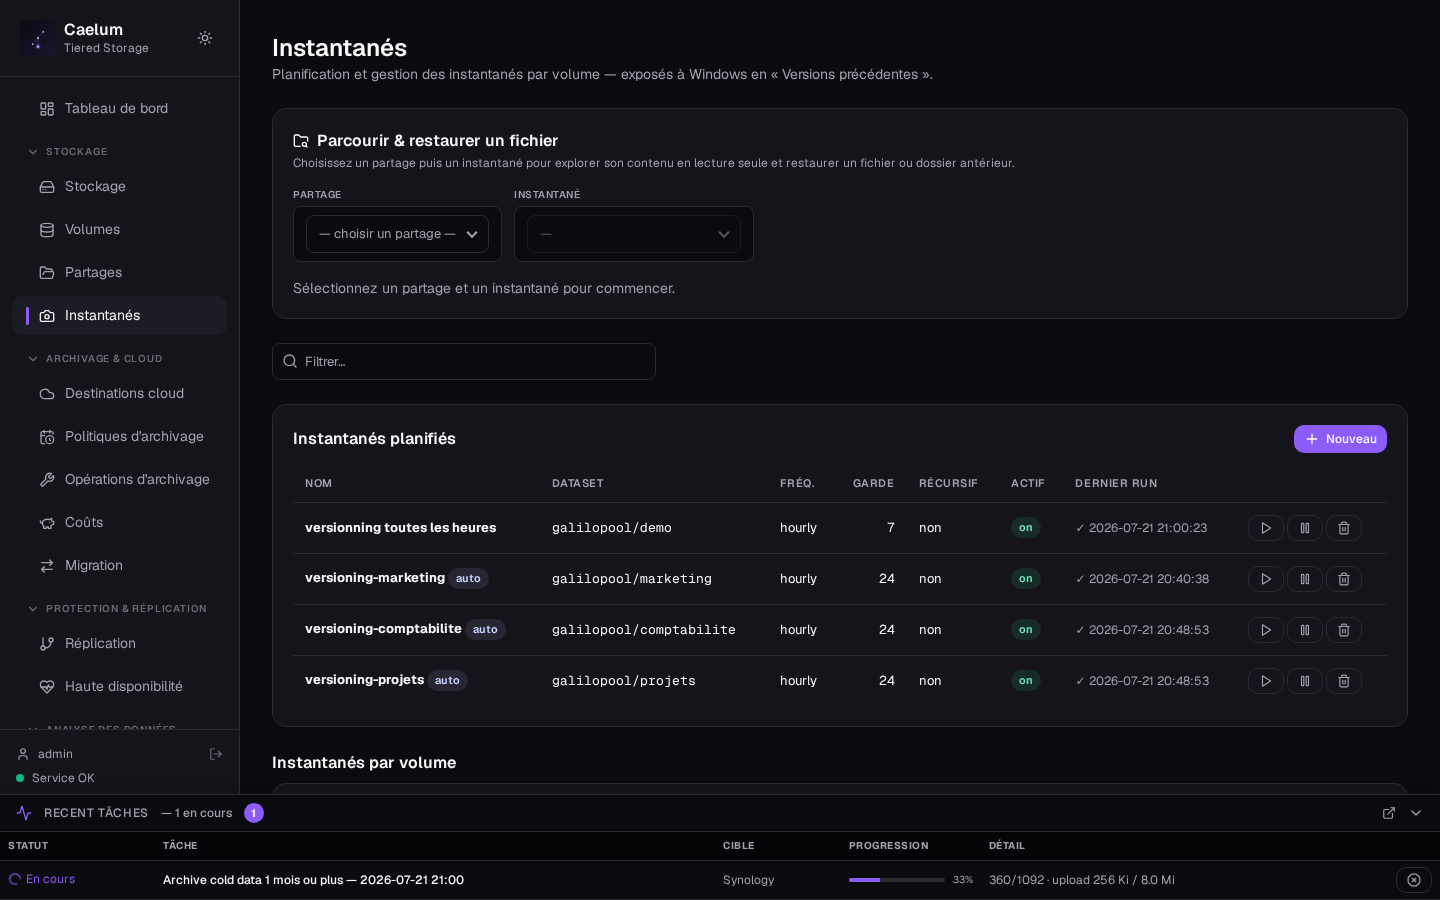
The Snapshots screen has two tabs. Snapshots lists the existing ZFS snapshots (filterable), with Roll back to this snapshot and Delete this snapshot. Schedules manages schedules: New schedule → dataset, frequency, retention (number of snapshots kept; beyond that, the oldest are deleted on each run), Recursive, Enabled and Windows Previous Versions (names snapshots in the format expected by Explorer). A volume snapshot covers all of its shares; it is near-instantaneous and only takes up the space of later changes.
Previous Versions (Windows)#
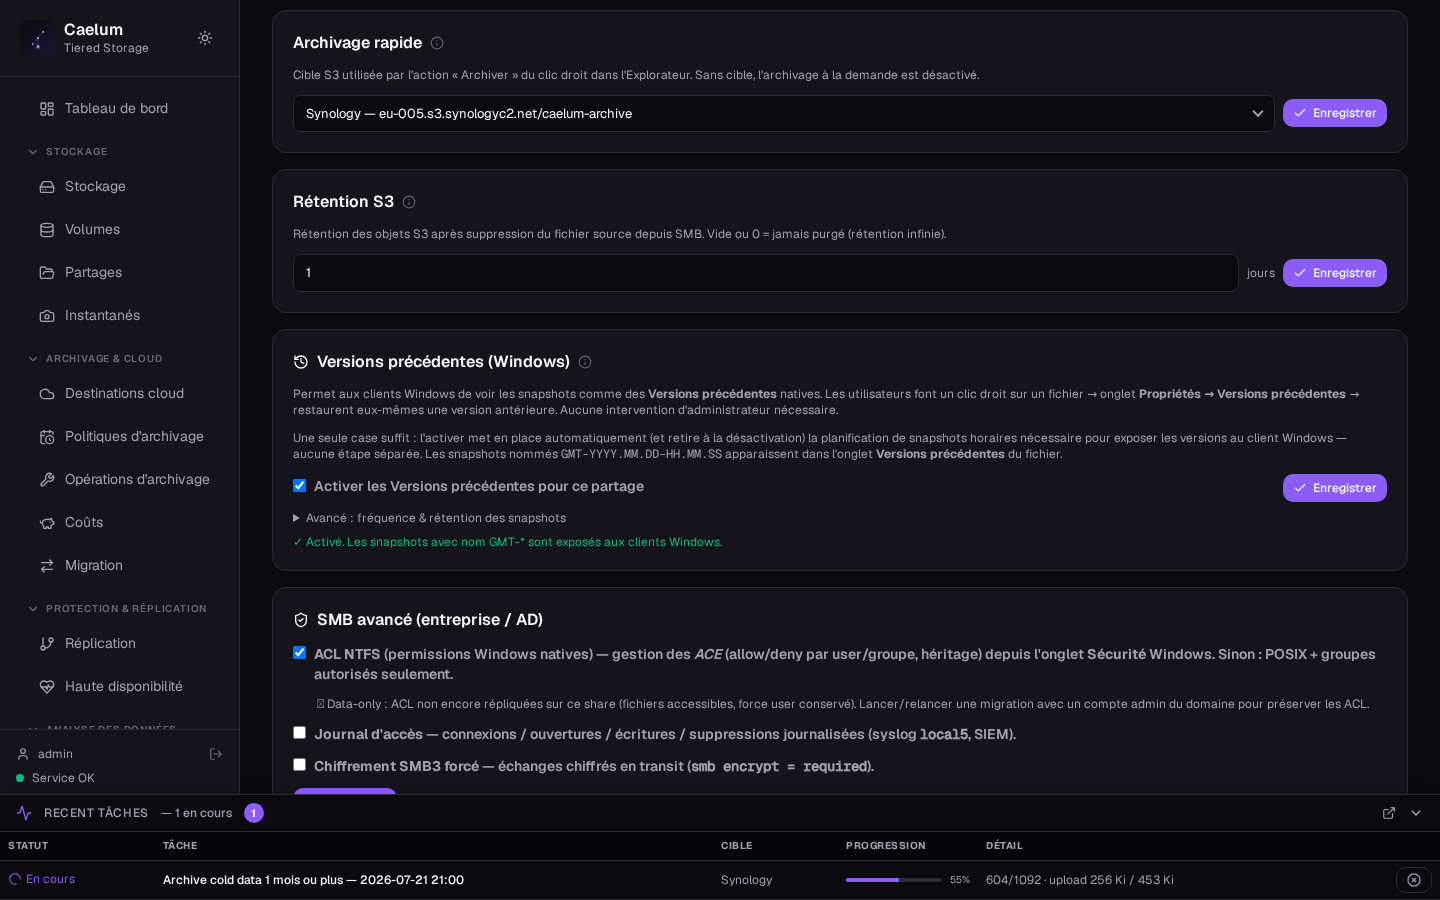
Windows exposure of earlier versions is managed with a single checkbox in the volume's edit window: "Previous versions (Windows)".
Enabling it provisions the whole chain (Samba exposure + a snapshot schedule managed by the volume); disabling it cleans it up. The options (hourly / daily / weekly frequency and retention, default 24 snapshots) appear under the checkbox. If the schedule exists but its runs fail, the window says so.
On the Windows user side: right-click a file or folder → Properties → Previous Versions tab → restore or open. On the administrator side, the Previous versions card of a share's detail browses a snapshot and restores a file, next to the current file or in its place.
The previous version of an archived file cannot be read from Windows (access denied): restore it from the share's Previous versions card.
Replication#
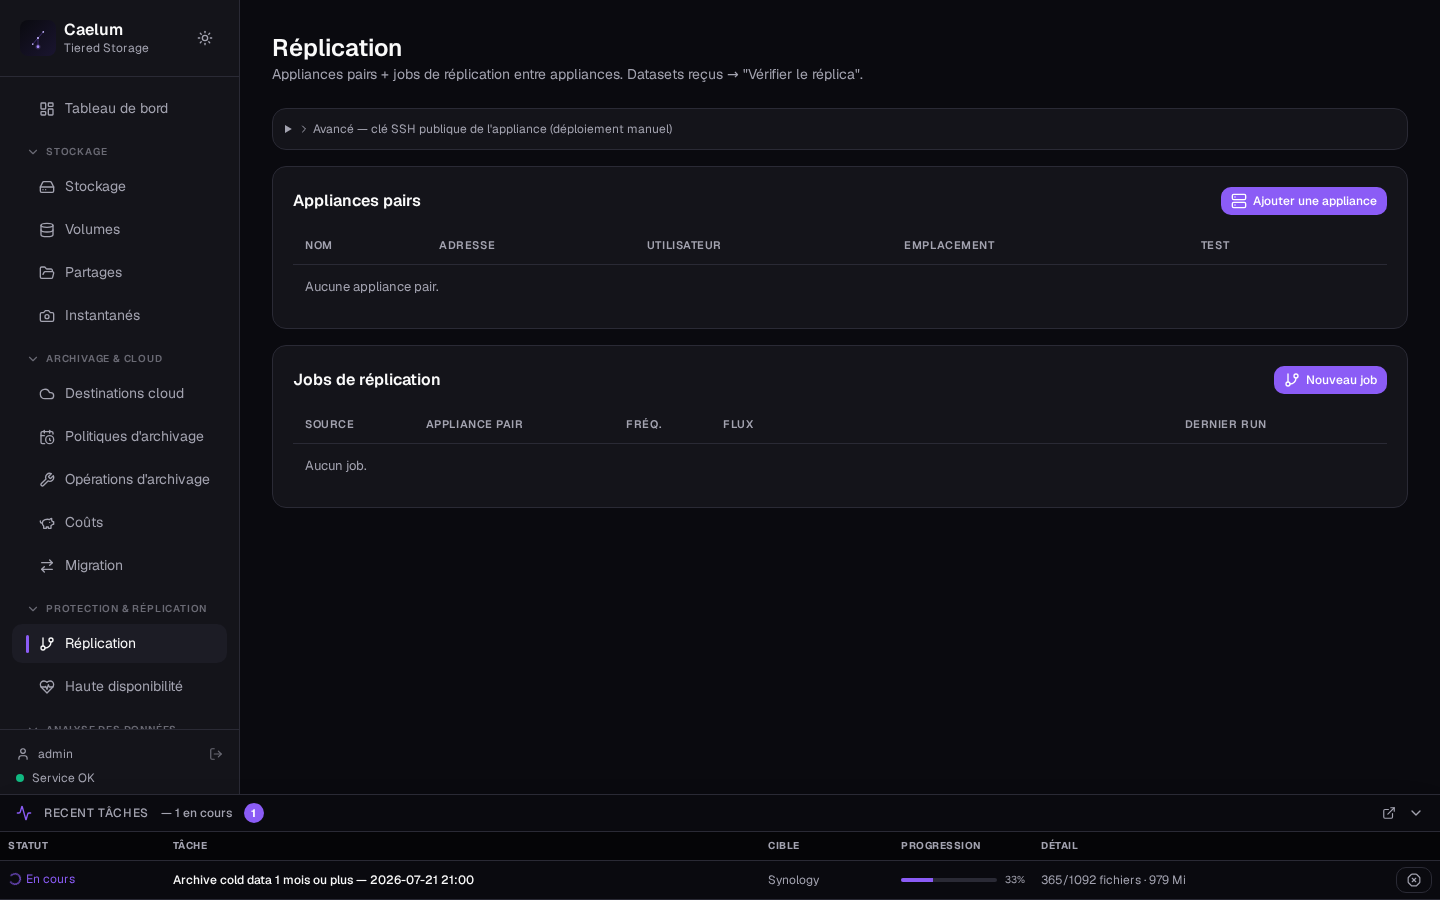
The Replication screen follows the copy of your volumes to a second Caelum appliance (remote site) for disaster recovery: aggregated state and copy lag (RPO), replication jobs (with Send now), replication destinations, the node's public key and Pair a target, incoming replication (with Mount for recovery, read-only), recovery readiness measured on both nodes, and Switch over to this node.
In 0.65.5, creating replication targets and jobs (frequency, continuous mode, throughput test) is done in the previous interface, https://<appliance-ip>/legacy, Replication screen. Replication and high availability are labelled "Beta — not qualified".
The full details (pairing, frequencies including continuous mode, ACL fidelity, DR) are in the replication guide.
High availability#
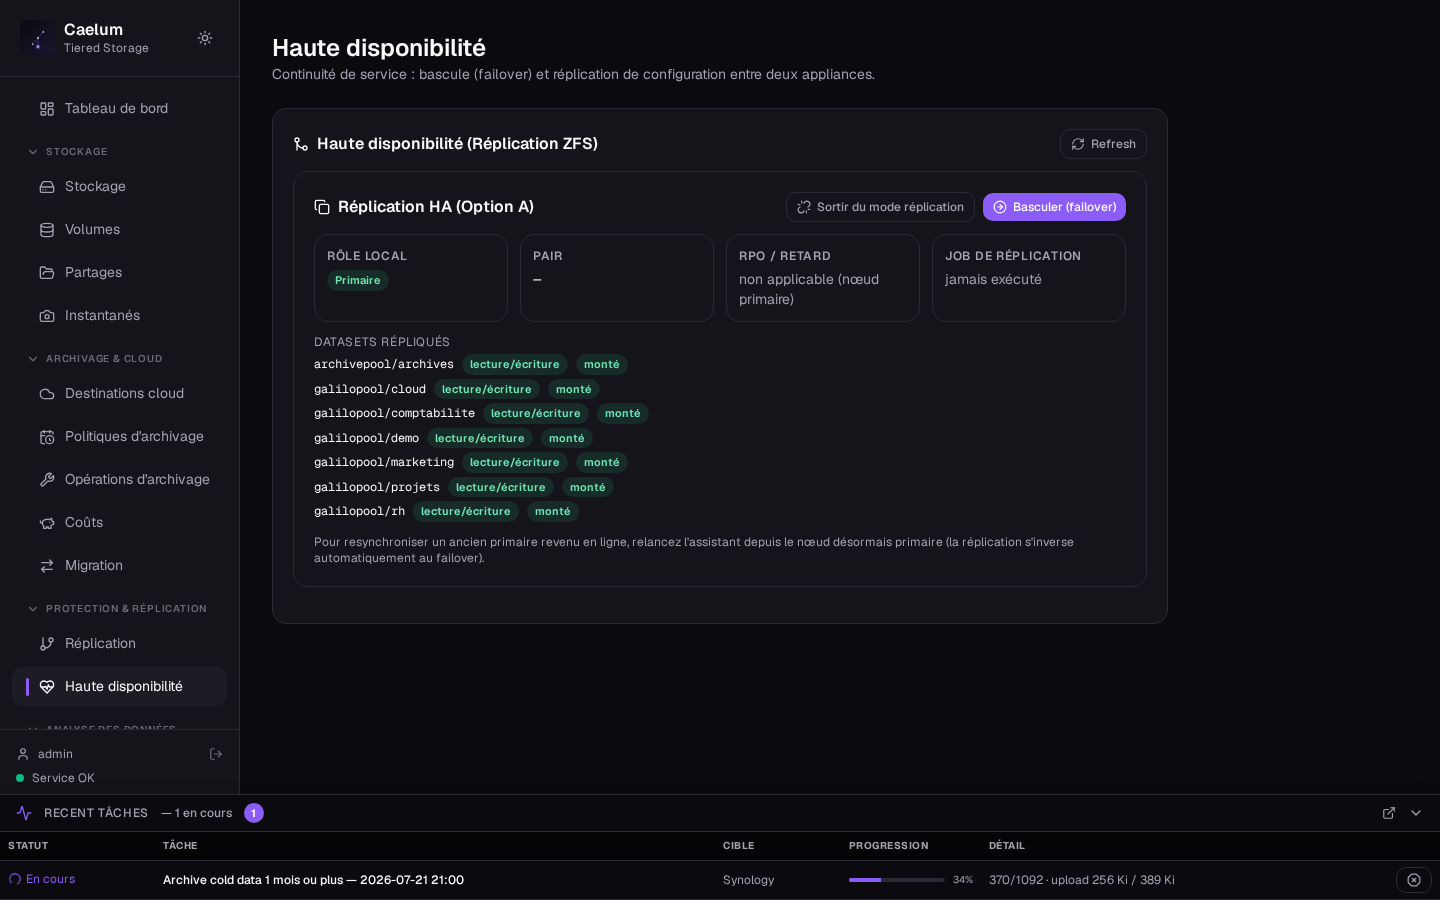
The High availability screen pairs two appliances, in two modes, both beta, not qualified:
- Shared storage: both nodes see the same disks (LUN/SAN); only one imports the pool at a time, under Pacemaker. Near-instant failover with no data loss, but requires a shared array. The Create a cluster button opens the Create a shared-storage cluster wizard (nodes, cluster service password, pool, virtual address); the acknowledgement "I accept the split-brain risk (no fencing)" is mandatory, because fencing cannot be configured in this version. With the peer's credentials, the wizard compares the pools' identity and refuses by default storage that is not actually shared.
- Replication: each appliance keeps its local pool; an asynchronous ZFS replication keeps the passive node read-only. The Continuity by replication → Set up replication card configures the peer. RPO = replication interval, manual failover (Switch over to this node, Replication screen). Details in the replication guide.
Without fencing, nothing physically prevents two nodes from serving at the same time. With replication, files archived by a version earlier than 0.64.1 cannot be read on the promoted node until they have been re-archived. Test any failover outside production.
iSCSI and Multipath (MPIO)#
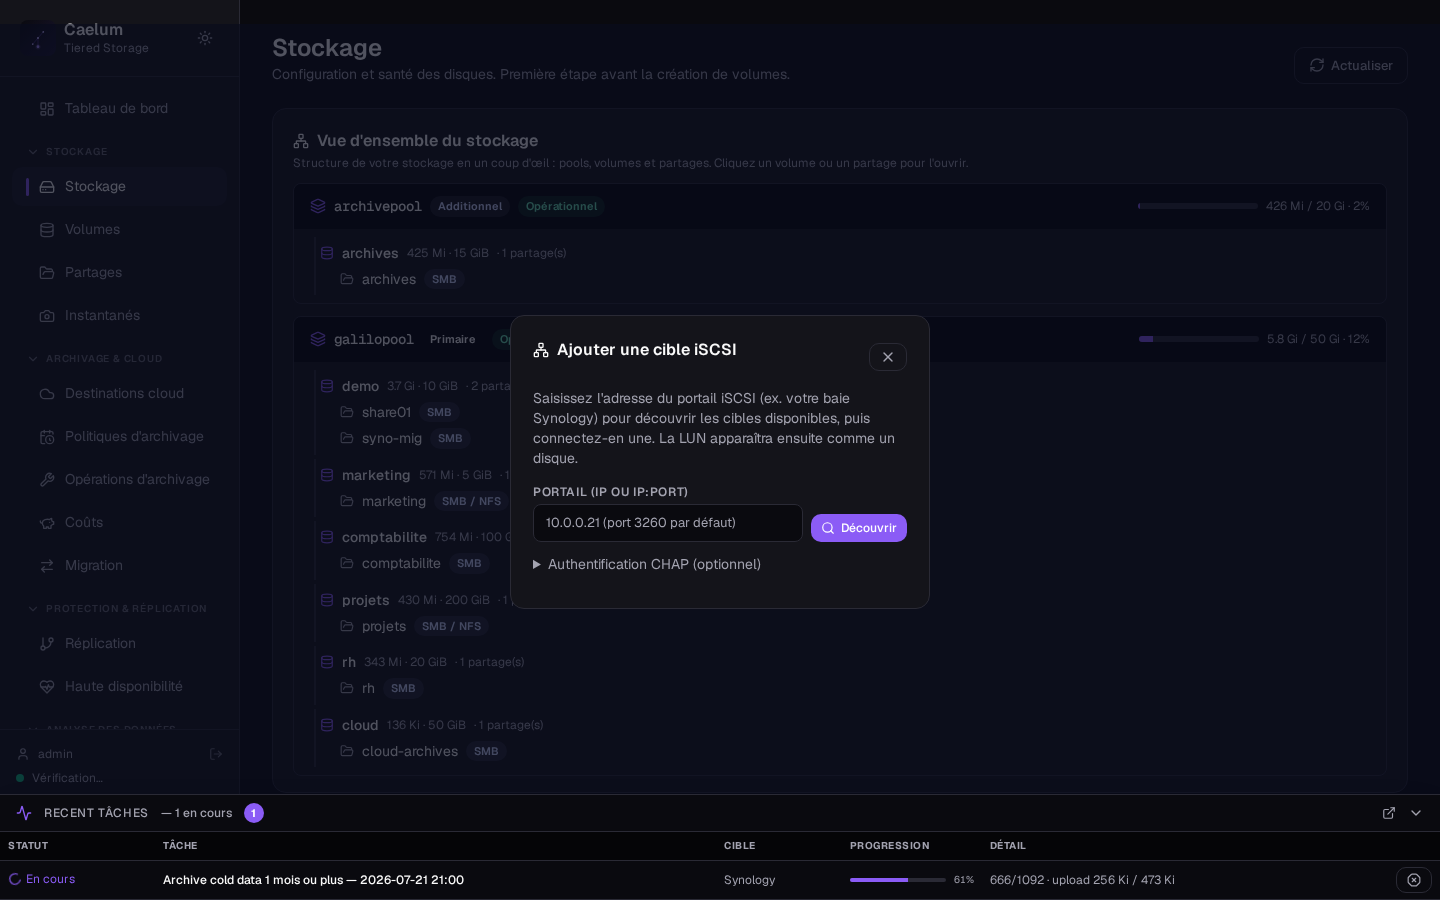
The iSCSI screen lets you attach a remote iSCSI LUN (for example a Synology array) to use it as a disk in a pool:
- Enter the portal (
host:port,3260by default) and click Discover. - On the target found, click Log in; enter the CHAP user and CHAP secret if needed (leave empty for a target without CHAP).
- The LUN then appears as a disk that can be used to create or extend a pool.
The Sessions section lists open sessions (Log out, Forget target). Logging out is refused as long as the LUN belongs to an imported pool (protection against pool loss).
Multipath (MPIO) is managed in the Multipath section (Edit multipath.conf, Reload multipath), without SSH access — the appliance being hardened.
3. Archiving#
Cloud destinations#
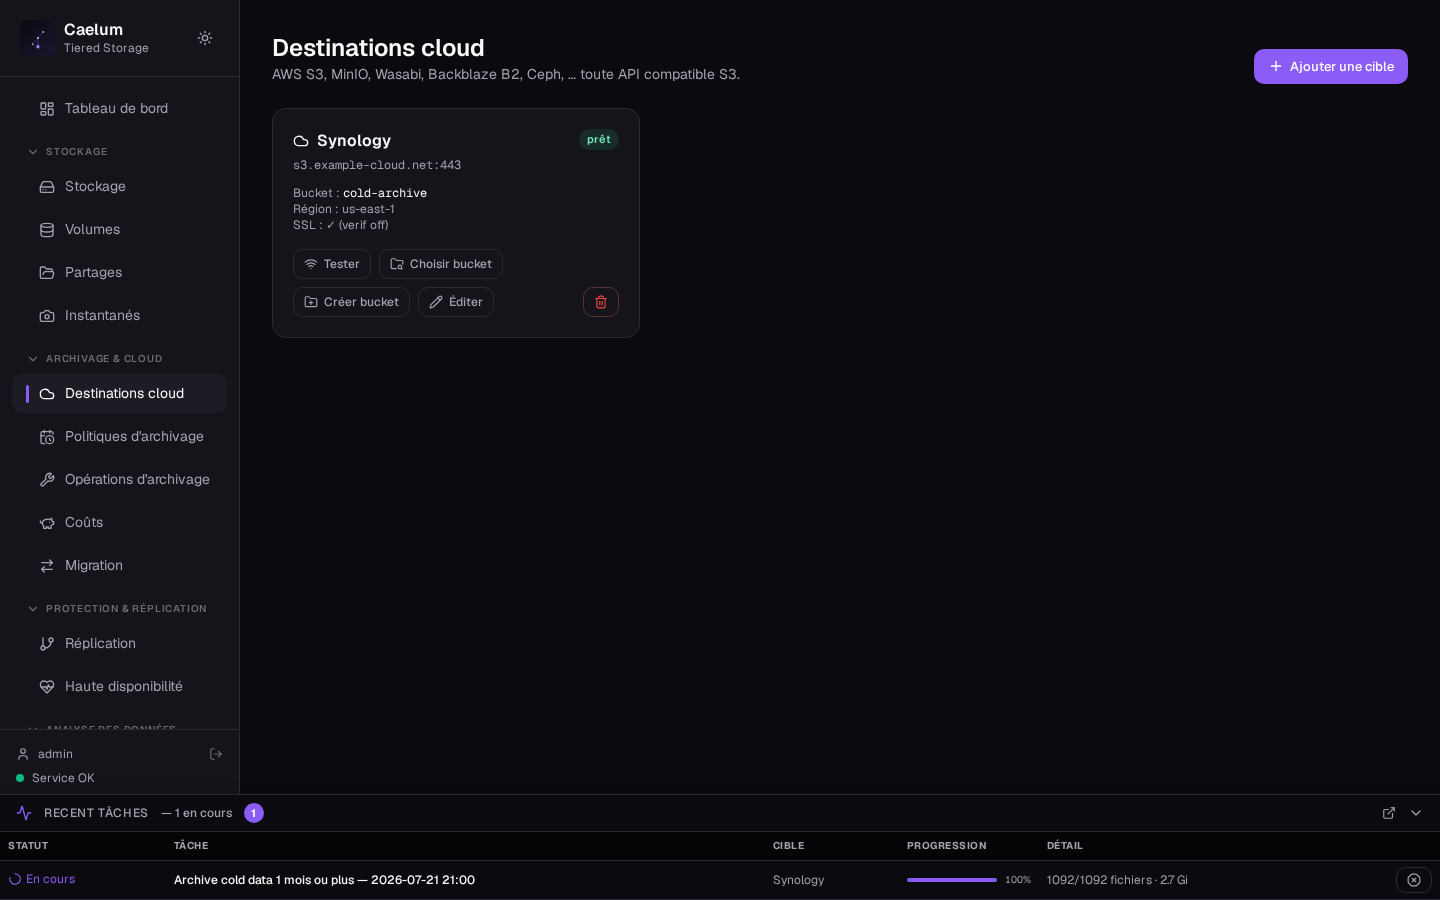
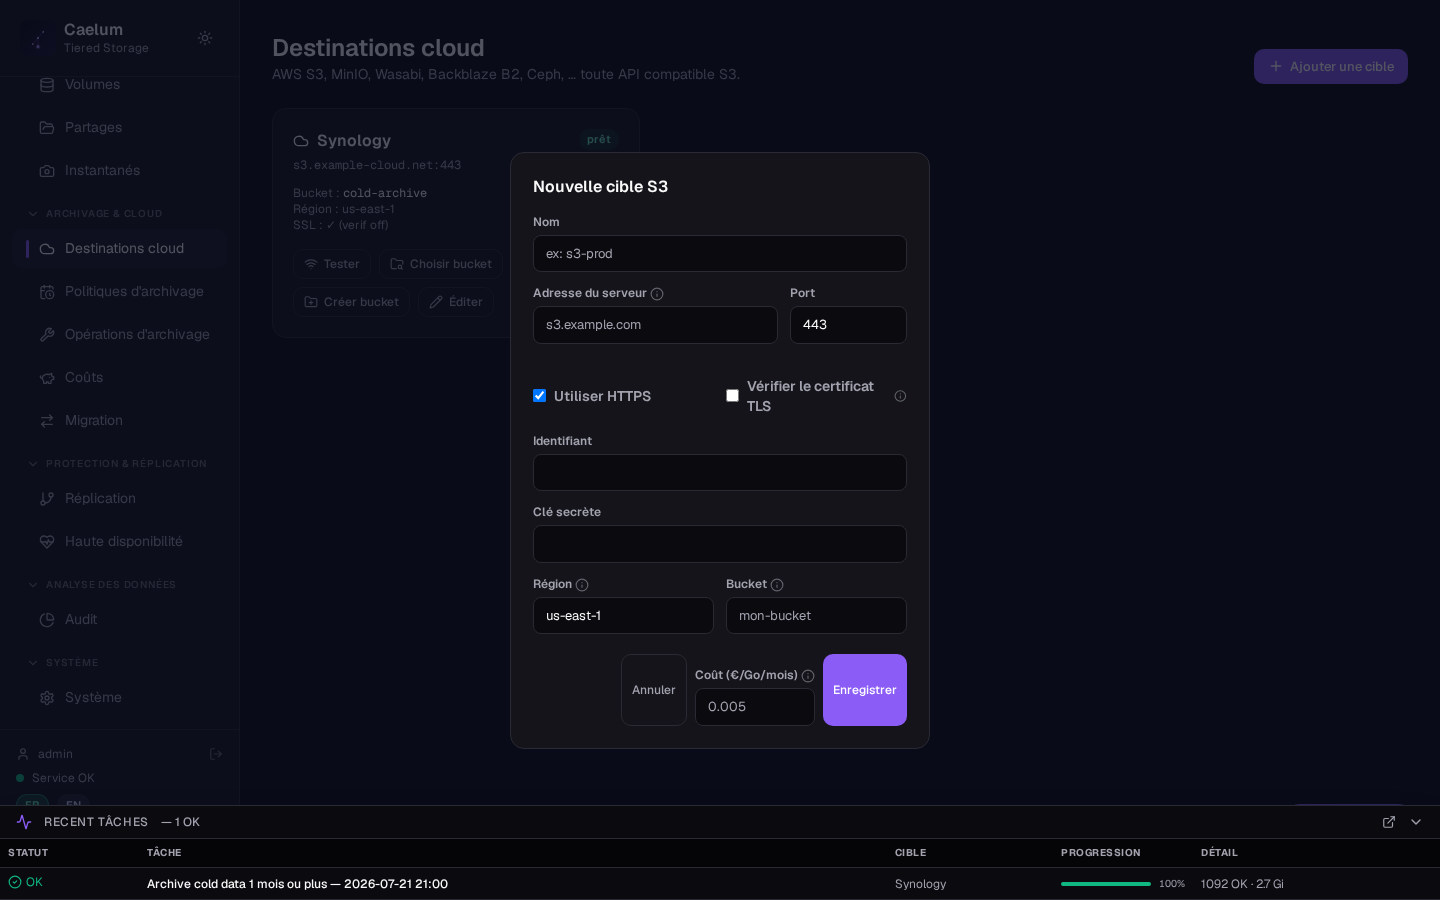
The Cloud destinations screen declares the object backends to which Caelum archives cold files: AWS S3, MinIO, Wasabi, Backblaze B2, Ceph and any S3-compatible API.
Click New destination and fill in:
- Name and Endpoint (e.g.
https://s3.eu-west-3.amazonaws.com), Region. - HTTPS and Verify the certificate: leave enabled in production.
- Access key / Secret key: the secret is never shown again after saving.
- Default bucket: it must exist (the List buckets and Create a bucket buttons help you pick it).
- Server-side encryption (SSE-S3) (optional).
- Cost (€ / GiB / month): used to compute the Cost screen.
- Forced part size (optional): empty = measured value.
Each destination offers Test the connection, Measure throughput (tries several transfer settings and keeps the fastest, without storing anything in the bucket) and Probe capabilities (metadata, tags). The Archived objects list shows the objects uploaded.
Make sure the credentials can read, write and delete in the bucket. Plan for a sustained S3 throughput of 5 MB/s or more: the first access to an archived file depends on it.
Archive policies#
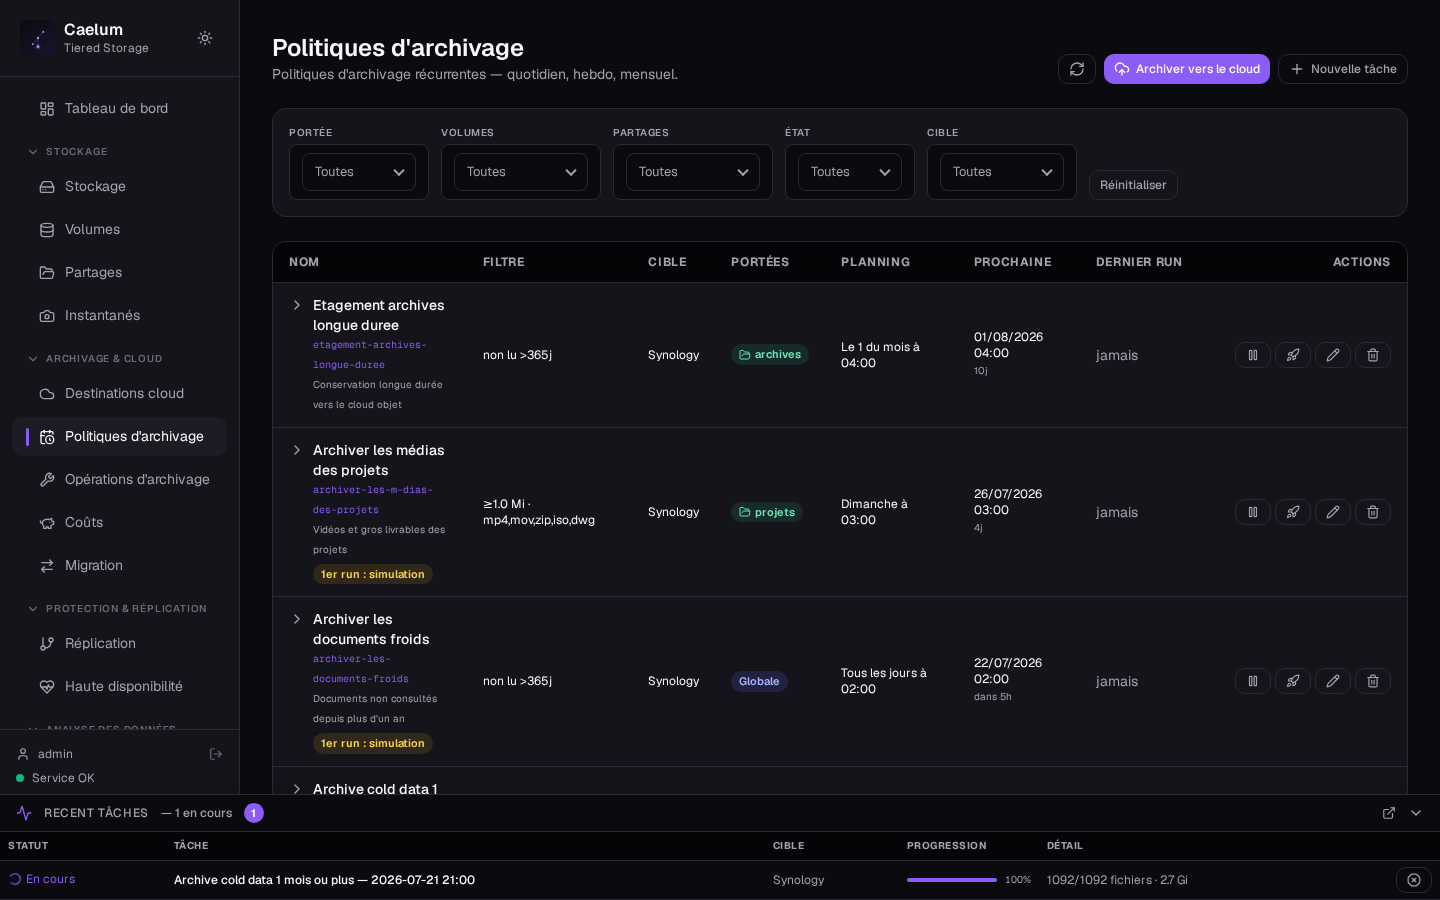
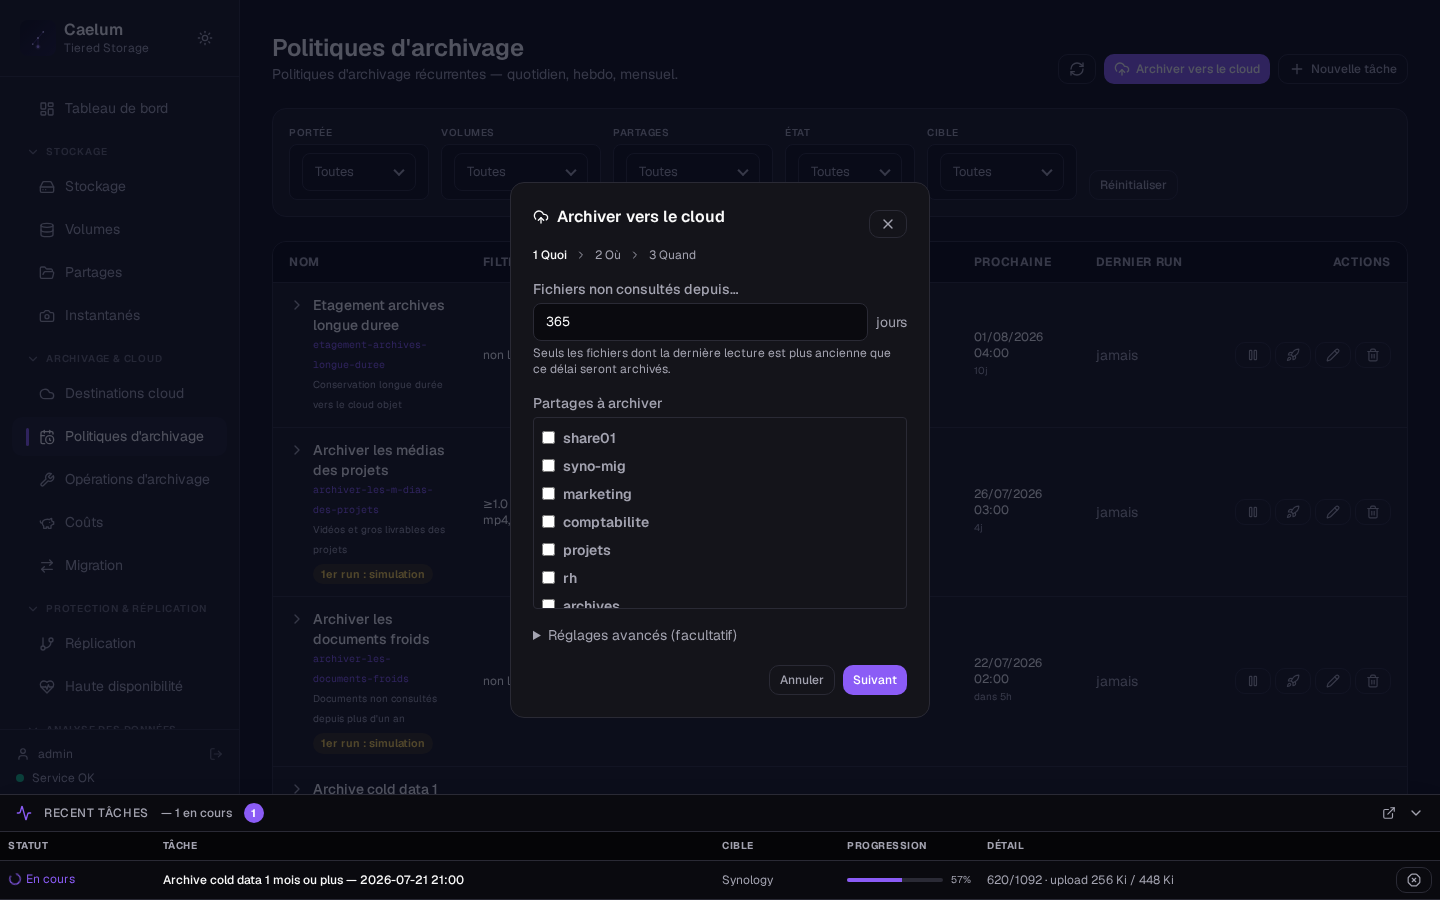
The Policies screen defines named, reusable archiving tasks. New policy opens the New archiving task window: name, cloud destination, scope (all shares or selected shares), which files (modified more than N days ago, minimum size, included or excluded extensions and paths), run time, Free up space after upload (the file becomes a stub) and Task enabled. A preview counts the matching files.
Each policy offers Dry run, Lancer pour de bon (run for real — labelled in French in this version), History, Attach a scope (global, volume or share), Edit and Delete.
The Archiving assistant (Open the assistant, at the bottom of the screen) creates the rule, the task and its scope in one go from an existing destination: shares to cover, age, extensions, minimum size, destination and frequency (once, daily, weekly). It warns you if partial streaming will not apply.
The first run of a new task is a dry run: nothing is uploaded until you run it again for real. File age is measured on the modification date (the last-read date is not tracked on pools created by the product).
Archiving tasks#
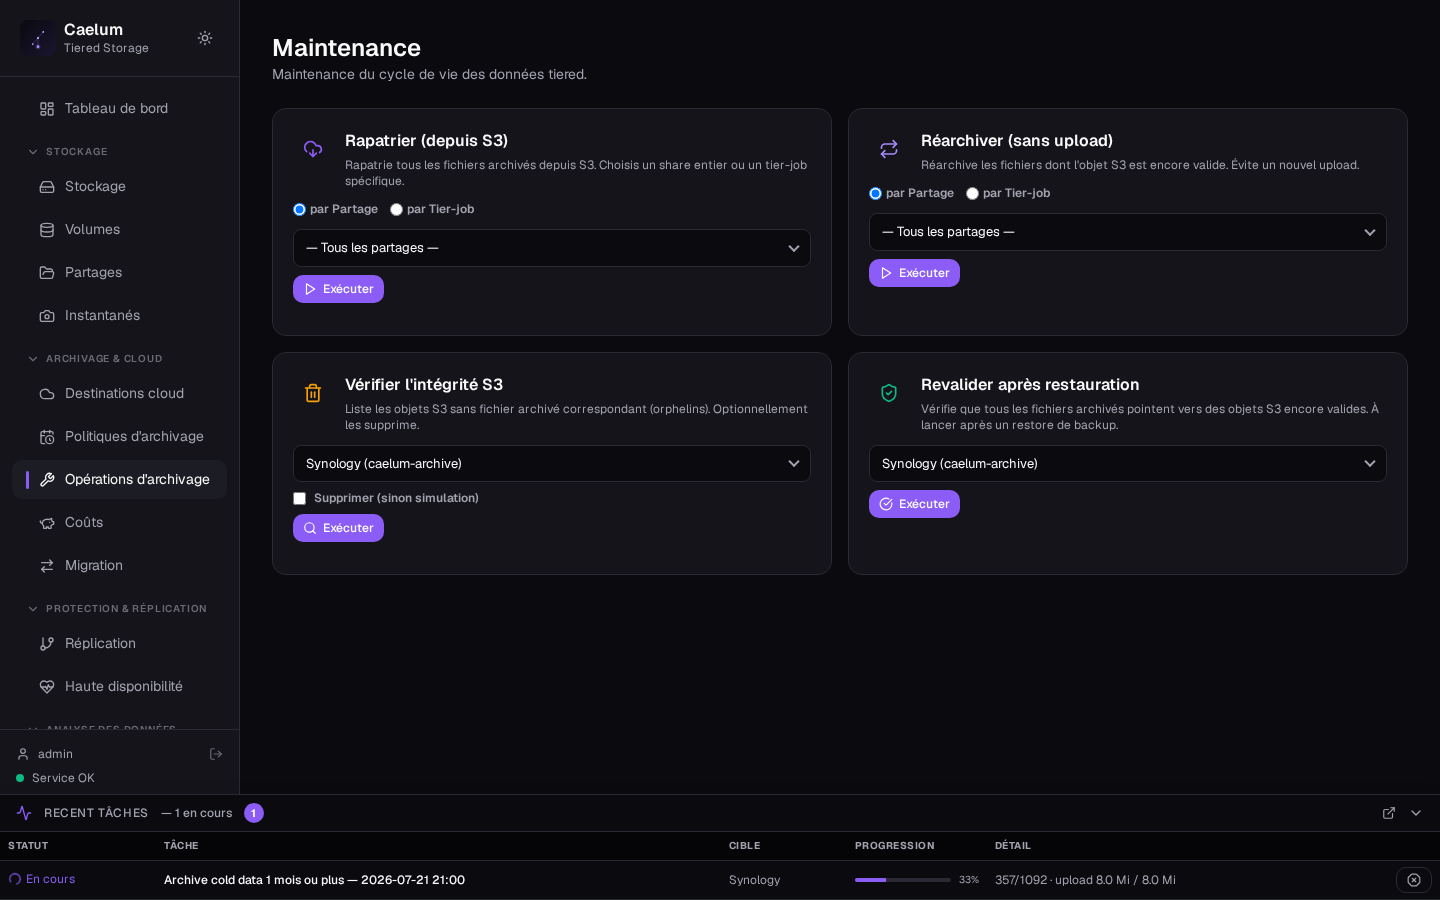
The Archiving tasks screen lists the upload runs to the cloud and their result (running, completed, partially failed, failed), with files, volume and errors. Per task: Run again, Upload again, Bring the files back, Leave stubs, Forget job; Clear finished jobs tidies the list.
Tiering vocabulary:
- Archive: copy a cold file to the cloud then replace it with a stub (offline file, with almost no local footprint, marked OFFLINE in Windows with a cloud badge). A file held open during archiving stays online and goes on the next run.
- Recall: bring the content back from the cloud when the file is opened.
- Re-archive: turn a recalled file that has become cold again back into a stub.
A stub stays visible and clickable. When opened, its content is recalled transparently: allow 1 to 5 s, then the target's sustained throughput. For large files, partial streaming reads only the requested range, without recalling everything, over SMB and NFS (NFS-Ganesha engine, the default for new installations); it applies to shares (or volumes) that have a cloud destination. The Play button in the browser plays audio and video.
Known limitation (0.65.5): over NFS, the first read of an archived file can fail if the S3 target is very slow (the 0.65.5 fix covers SMB). Sizing: during a recall, each workstation reading an archived file uses about 10 MB of memory on the appliance, and the recall service up to 0.5 GB; keep this margin on an 8 GB appliance.
S3 cache (share tiering)#
The Cloud tiering (S3 cache) section of a share's window enables automatic archiving of its cold files to an S3 destination (inherited from the volume or specific to the share), with a local cache threshold (GiB): cold files go to S3 and are replaced by stubs, the local disk acting as a buffer for recently used files. The S3 cache archiving card on the dashboard and the S3 cache card in the share detail track progress. Upload concurrency (1 to 8, 4 by default) is set in Advanced settings.
Changing a share's destination does not move files already archived: the old destination remains essential to read them.
Cost#
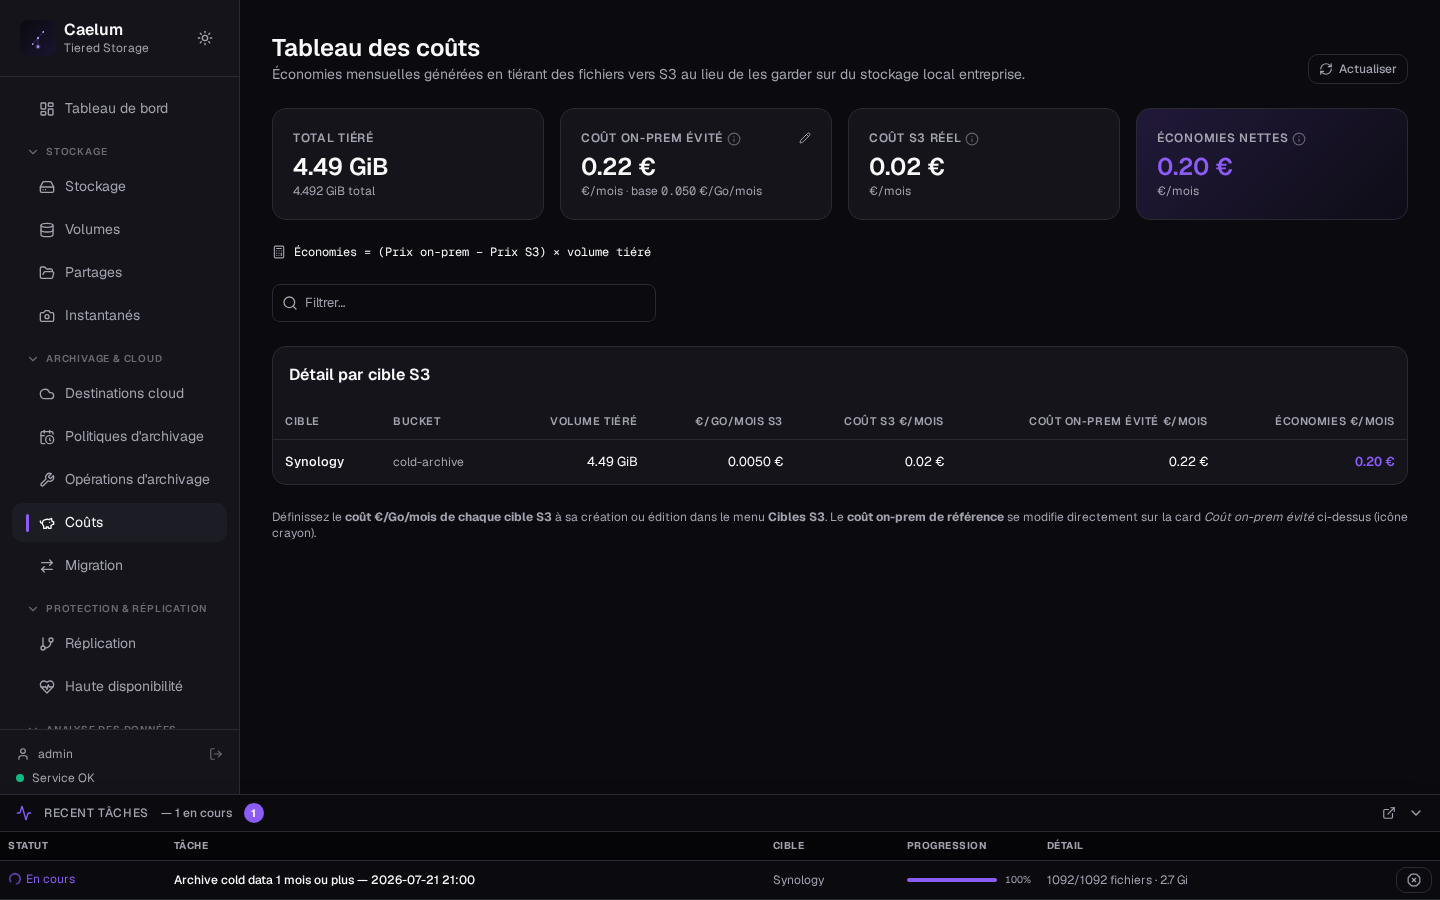
The Cost screen displays an estimate based on the volumes and parameters entered by the administrator. It is not a Caelum price, an invoice or proof of achieved savings. Check assumptions and actual usage independently.
Migration#
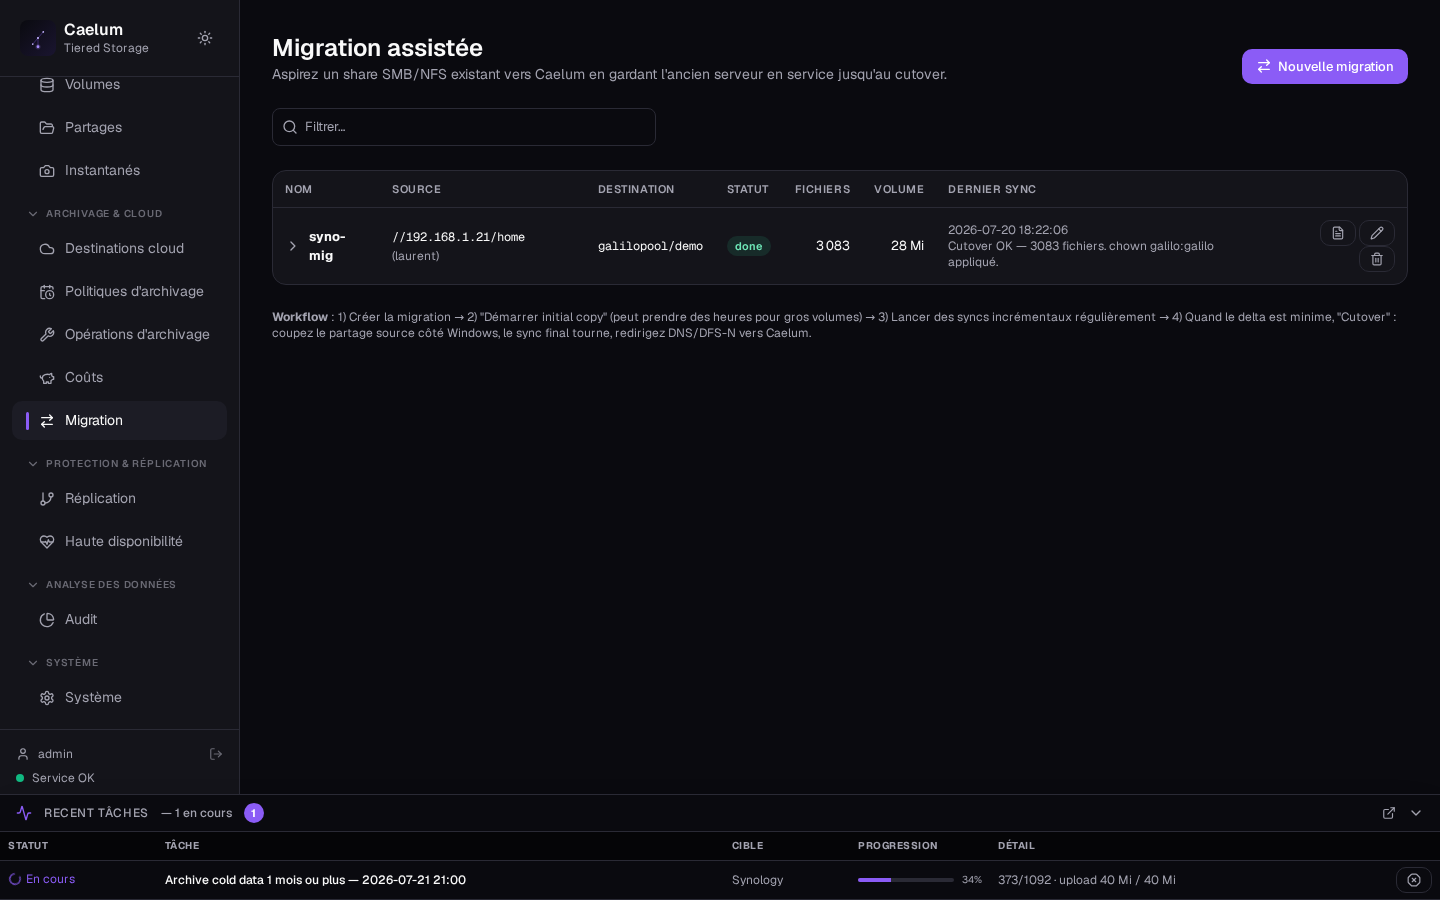
The Migration screen drives data takeover from an existing NAS or SMB share. New migration opens a 4-step wizard (source, destination, options, summary) with a connection test and the list of the source's shares. A migration is then driven with Start the copy, Resynchronise, Compare source and destination, Copy log and Cut over.
4. Access#
Identities: Active Directory domain#
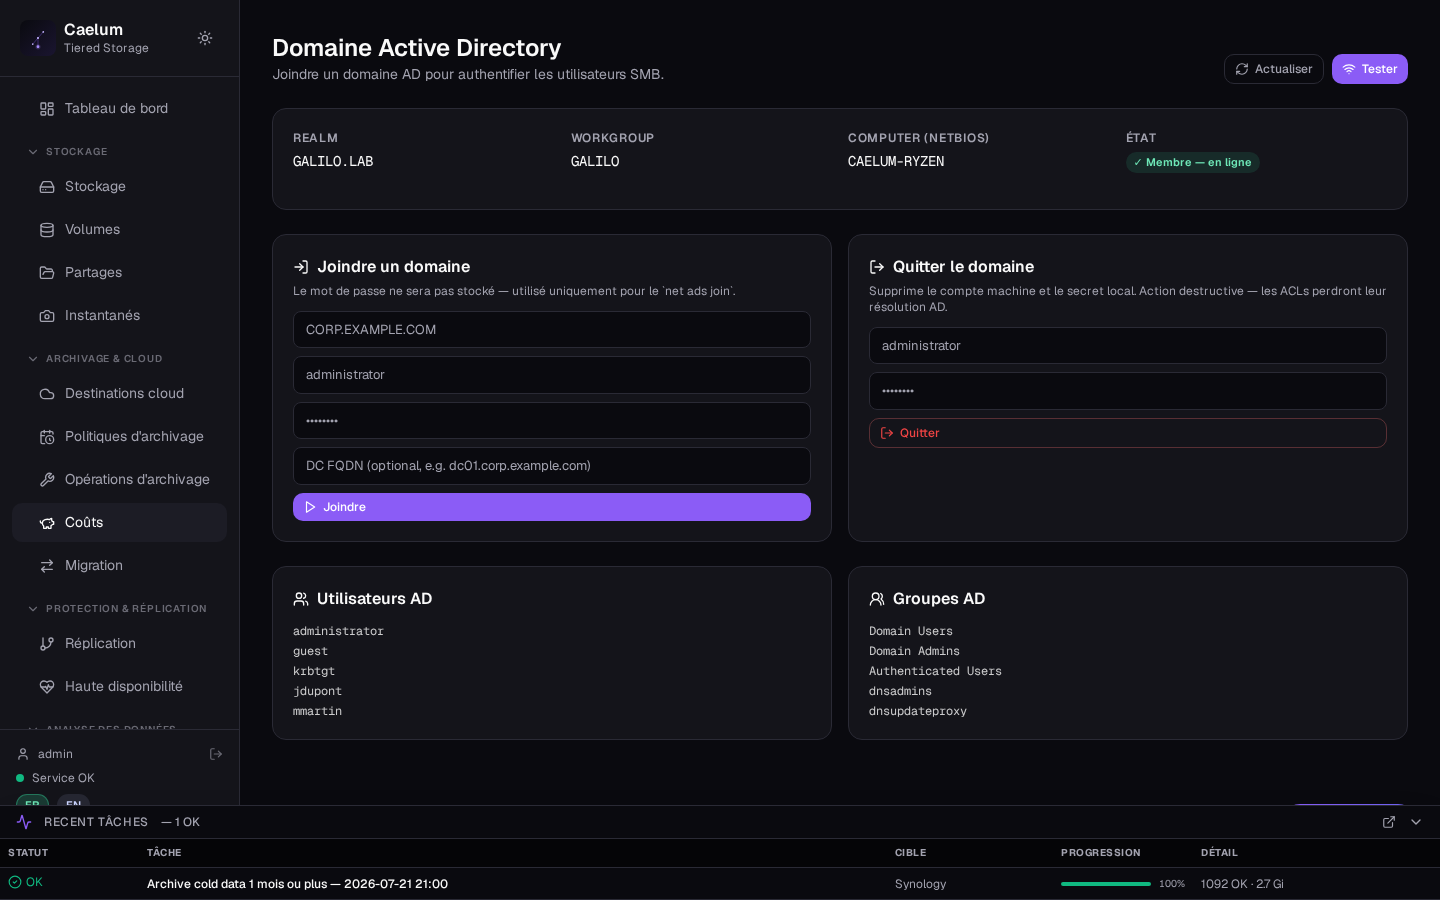
The Identities screen gathers where the users accessing shares come from: Active Directory, external LDAP directory or built-in directory.
To authenticate SMB users through the corporate directory, the Domain section joins the appliance to an Active Directory domain (Kerberos). Start with Check DNS (the domain must resolve through the controller), then Join the domain: realm (e.g. CORP.EXAMPLE.COM), domain administrator and password (used only for the join, never kept), and optionally the organizational unit and NetBIOS name (left empty, it is requested from the controller). Once joined, the appliance shows Domain member; AD users and groups become usable in share access lists.
Leave the domain immediately removes access for domain accounts: the appliance falls back to its local accounts and file owners no longer resolve to names.
Identities: LDAP#
Without Active Directory, two SMB identity options are available in Identities:
- Built-in LDAP directory: a directory internal to the appliance to manage SMB users and groups without external infrastructure (New LDAP user, New LDAP group).
- External LDAP directory: connection to an existing directory (OpenLDAP, 389DS, FreeIPA…): host, port, base DN, bind account and password; TLS (LDAPS/StartTLS) available.
Activity trail, governance and content analysis#
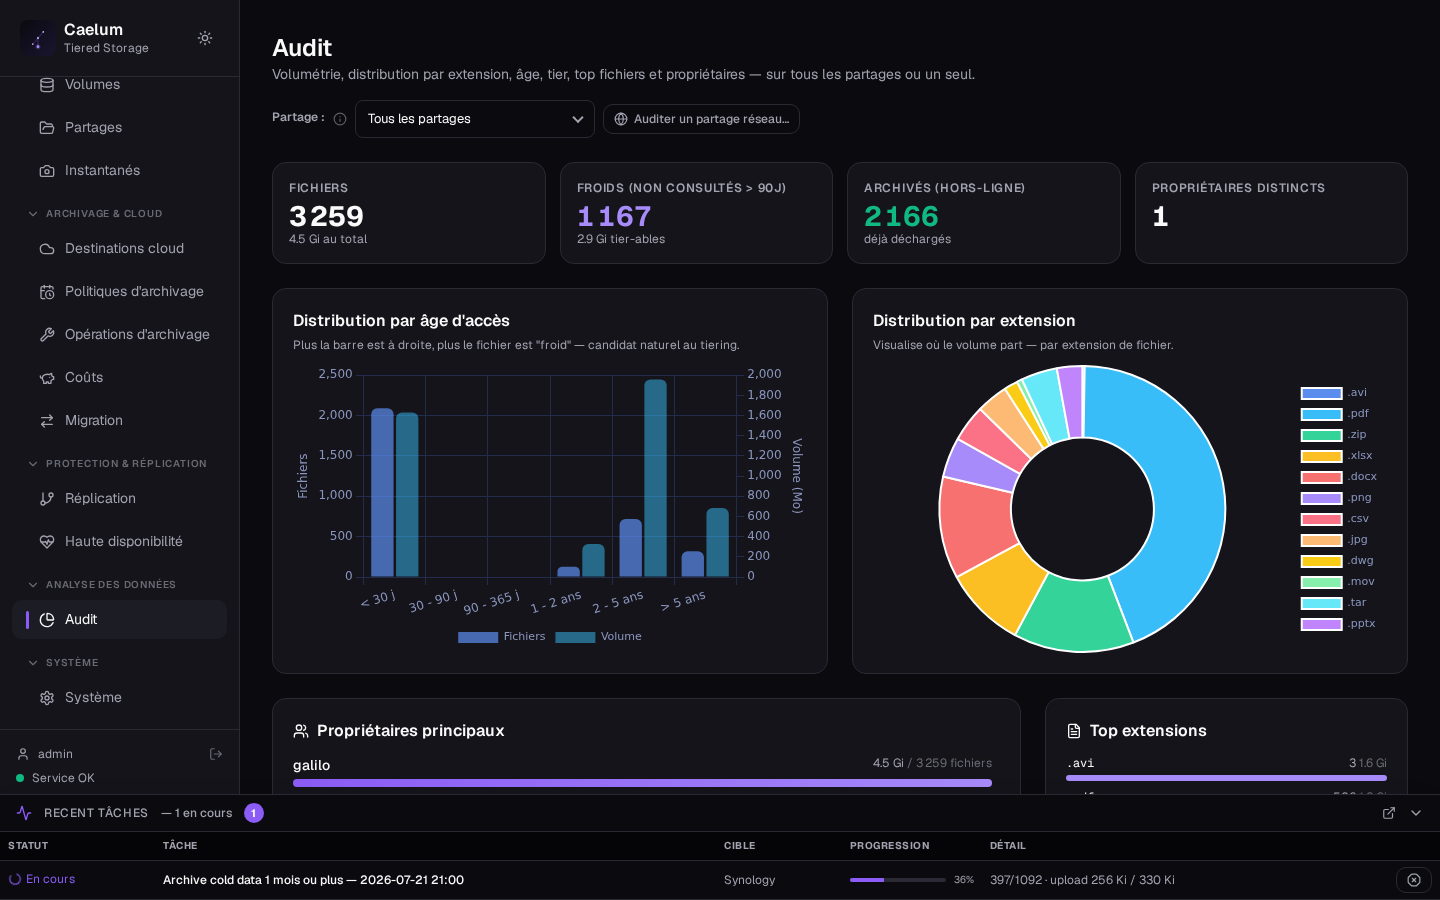
The Access group brings together the analysis screens:
- Activity trail: log of data accesses (shares with Log accesses checked) and administration actions, with daily sealing, chain verification and sending to a SIEM.
- Governance (ACL): ACL inventory (Run an inventory) in three reports — over-broad rights, broken inheritance, unresolved trustees.
- Content analysis: inventory of share contents (age, types, volume, archiving candidates) to prepare a tiering policy or a migration.
- External audits (audit of a remote share), Duplicates (identical copies found by content) and Explore data.
5. Diagnostics#
Performance#
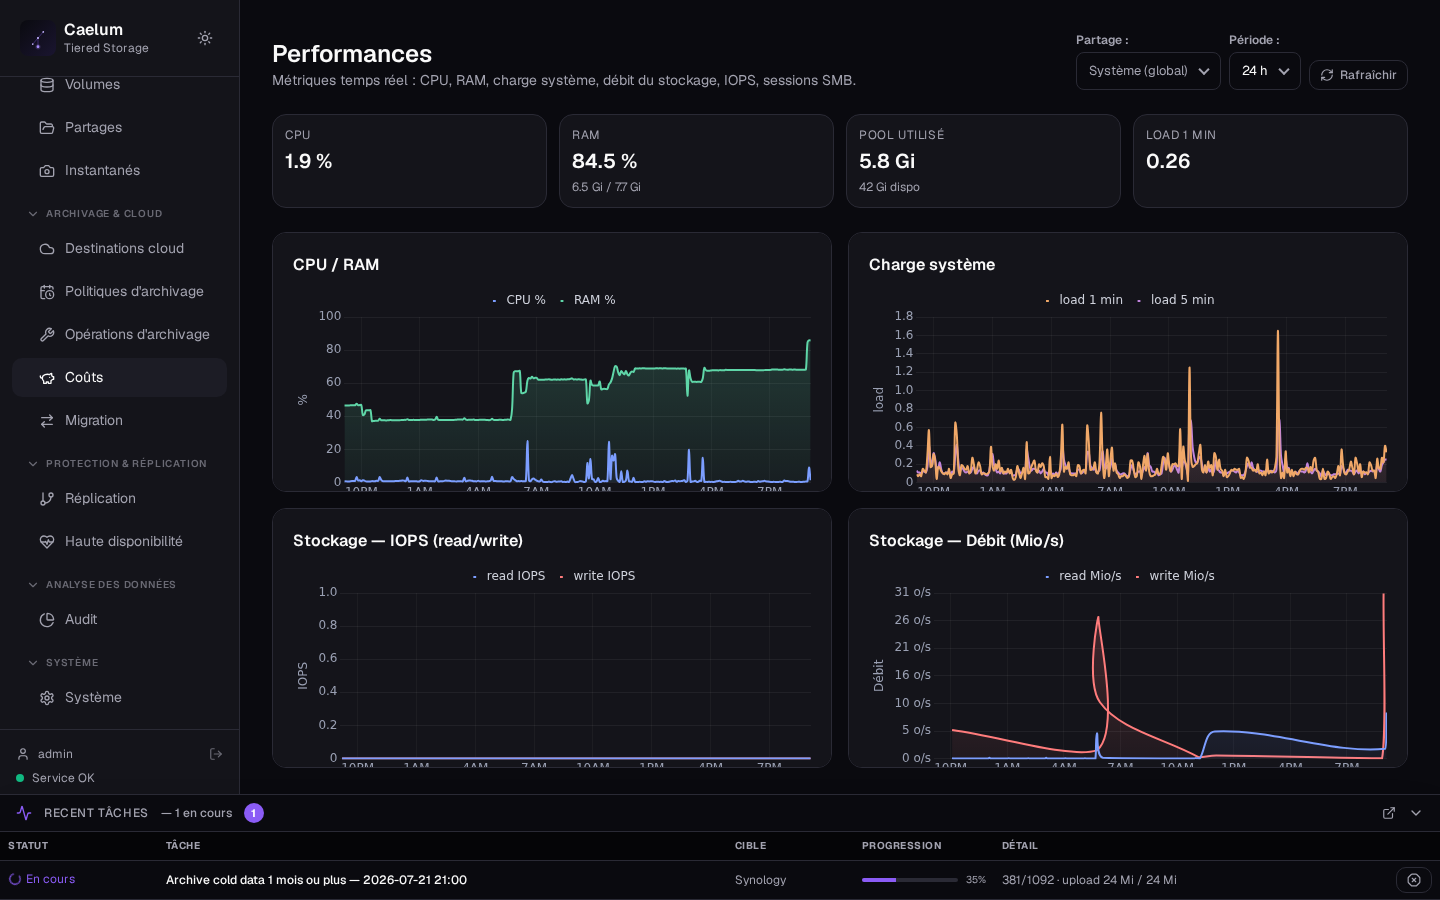
The Performance screen shows the appliance's measurements: latency, memory and load, with a per-share breakdown. History keeps 24 h at full resolution, then one hourly measurement for up to 35 days.
Logs and support#
The Logs screen shows the appliance logs. The Support screen gathers:
- Support account: Link an account opens Link the Caelum portal account (email address and password of your galilo.io portal account). The password is not stored: the appliance keeps a renewable token. This account is used to check and install updates in one click, open tickets and activate the AI assistant; it gives no access to your data. Licences on the account lists the available licenses.
- Support remote access: closed by default, opened for a limited time by an administrator (Open remote access, one-time code provided by support).
- Send a diagnostic bundle: Download the support bundle (configuration and logs, secrets masked, generated in 1 to 3 minutes) or Send logs with a ticket.
6. Settings#
Accounts#
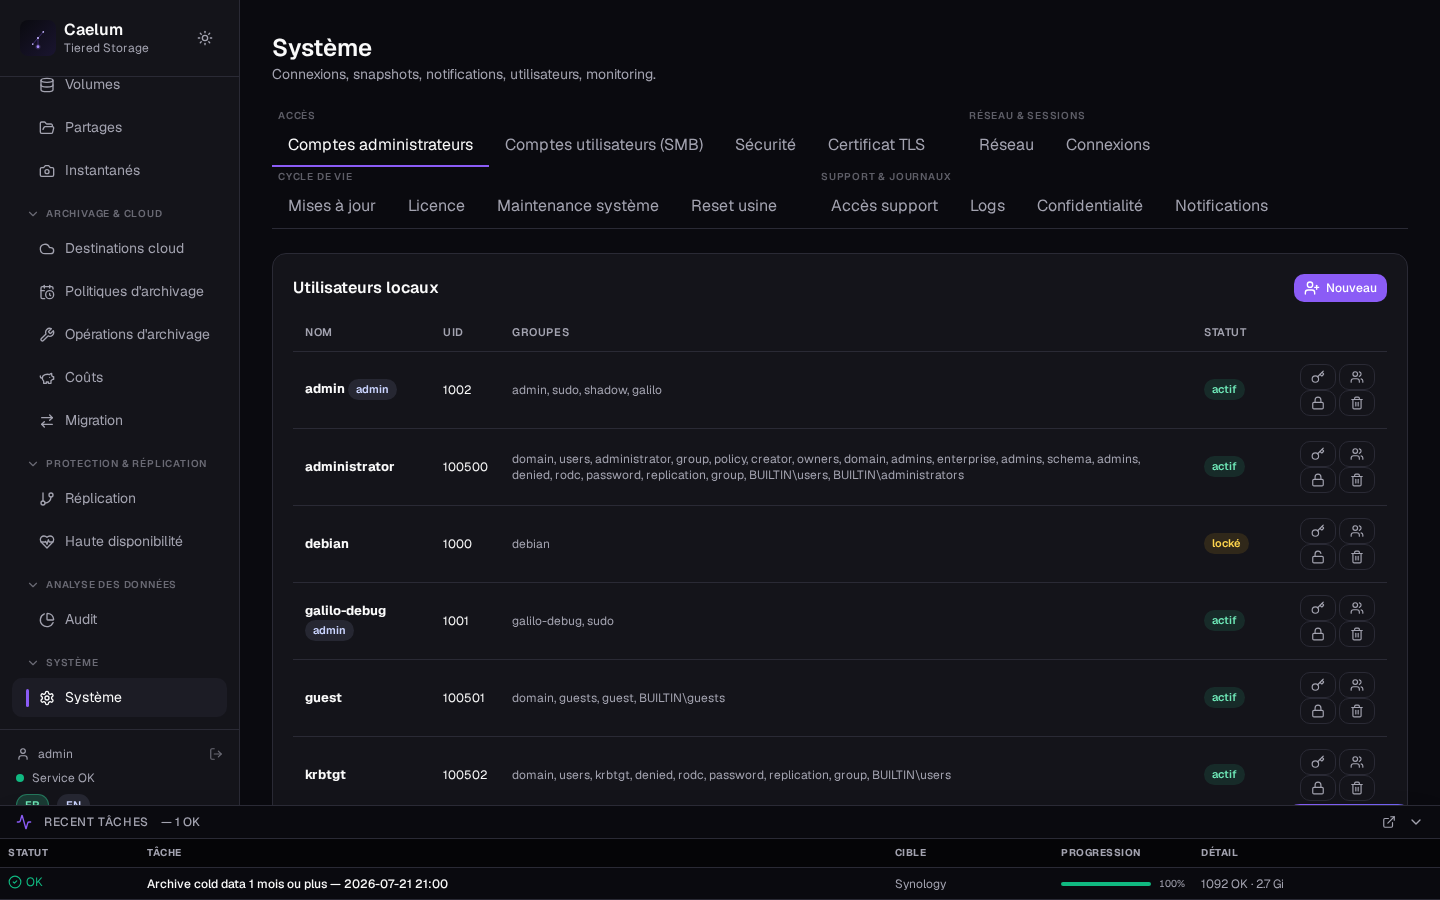
The Accounts screen manages the appliance's system and administration accounts: New account, Change password, Unlock, Delete. SMB identities (AD, LDAP) are in Access → Identities; global per-user/group quotas in Security.
Console access (since 0.65.7)#
Only console administrators can sign in: members of the local administrators group and, if you designate one, an Active Directory group. The Settings → Console access screen shows the list of administrators and lets you designate that group.
- After updating to 0.65.7, a banner asks you to check the list of administrators kept by the update (the account created at installation and the local accounts that signed in during the last 90 days). Remove any account that must not administer.
- A domain administrator signs in as
DOMAIN\name, once their group is designated. Without a designated group, domain accounts have no console access: sign in with the local administrator account to designate it. - The last usable local administrator cannot be removed, locked or deleted.
Network and interface roles#
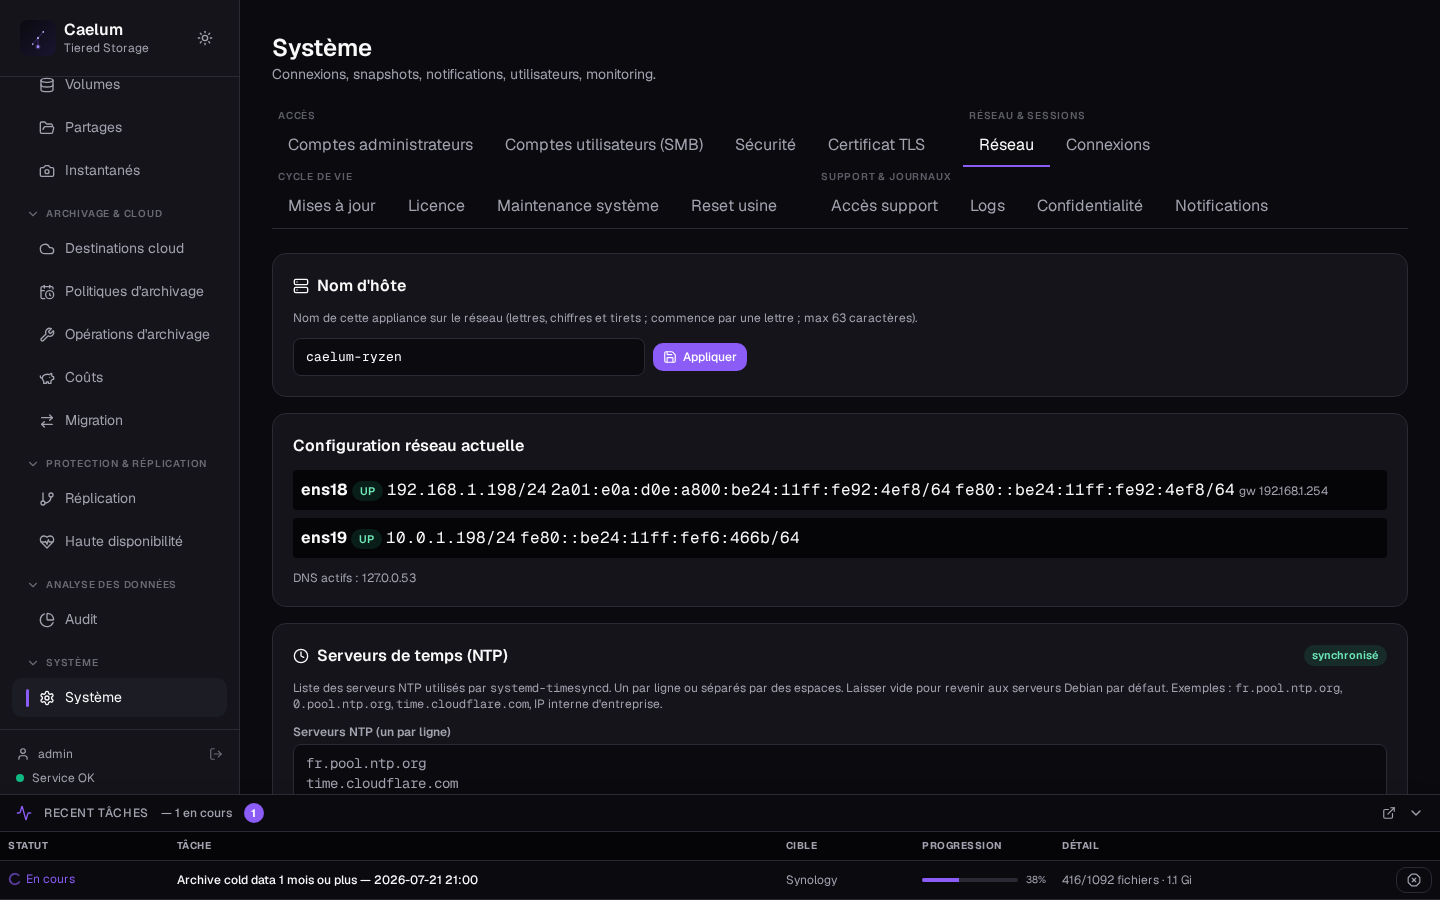
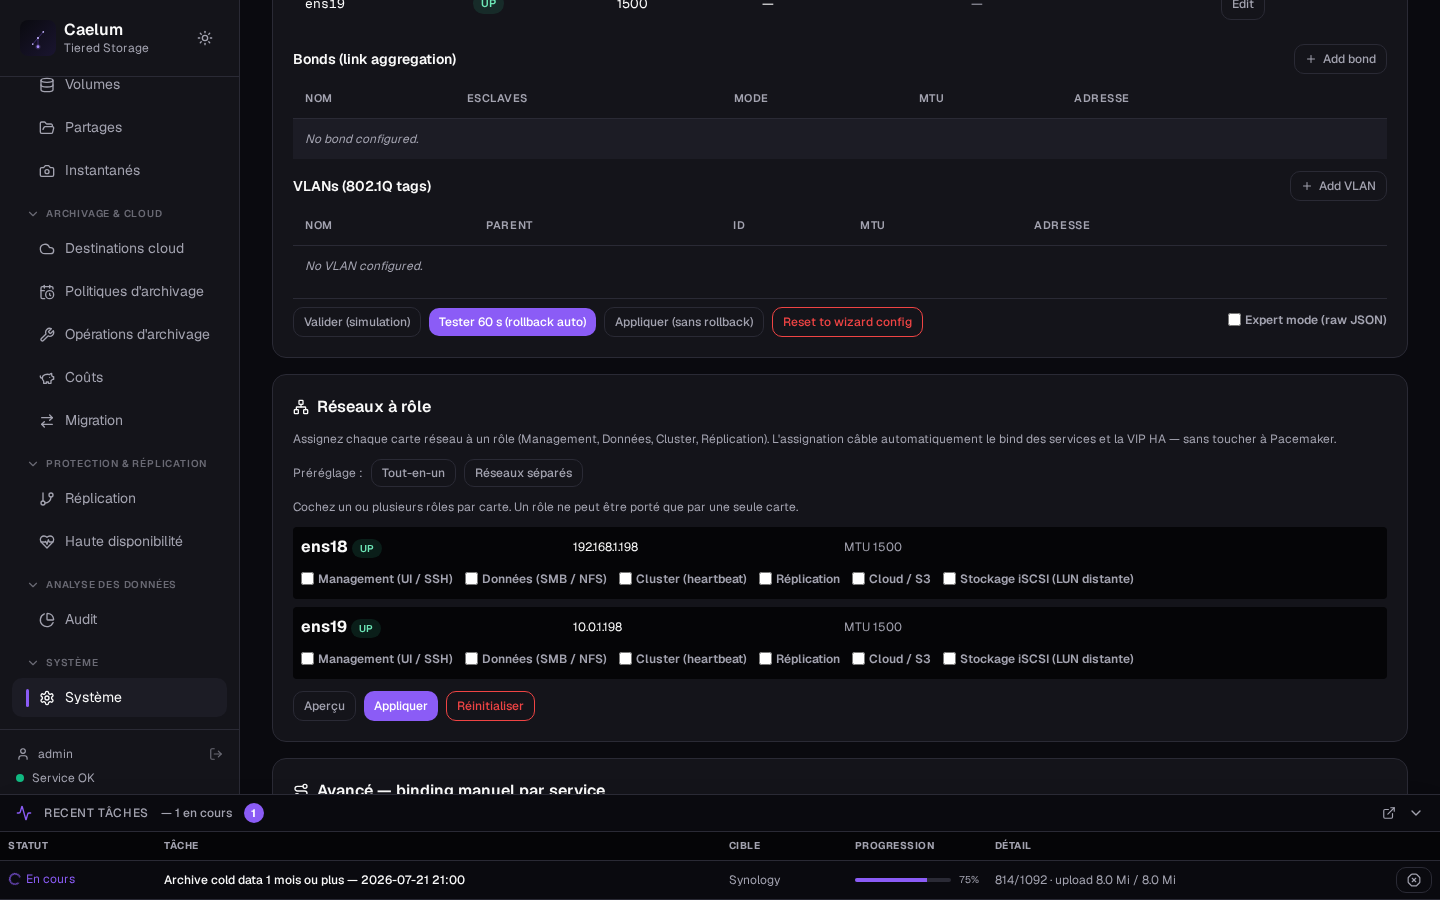
The Network screen shows the machine identity (host name) and the interfaces (IPv4 addresses, MTU). Change addressing switches an interface between Automatic (DHCP) and Static address (address/prefix, gateway, DNS); after applying, the interface is reachable at the new address. IPv6 can be disabled from the same screen (refused if your session goes through IPv6). The Advanced network section describes bonds (LACP 802.3ad) and 802.1Q VLANs (validate, test on the appliance, then apply) and the services' listening addresses.
The Interface roles state which card carries which use: Management (UI / SSH), Data (SMB / NFS), Cluster (corosync heartbeat), Replication, Cloud / S3 and iSCSI storage. A preset (all-in-one or separate networks) can be computed, then Check and Apply; the assignment sets the services' listening without touching the cluster by hand.
A risky network configuration is applied in test mode: without Confirm the configuration, it rolls back on its own (anti-lockout). If an assignment locked you out, Restore the administration binding reopens the console on all interfaces; Clear the roles goes back to interfaces that serve everything.
Network discovery#
The appliance appears automatically in client workstations' network neighborhood — in Windows 10/11 "Network" and in the macOS Finder (NAS icon) — via WS-Discovery and mDNS/Bonjour. No configuration is needed: it works from the moment the appliance is commissioned.
Security#
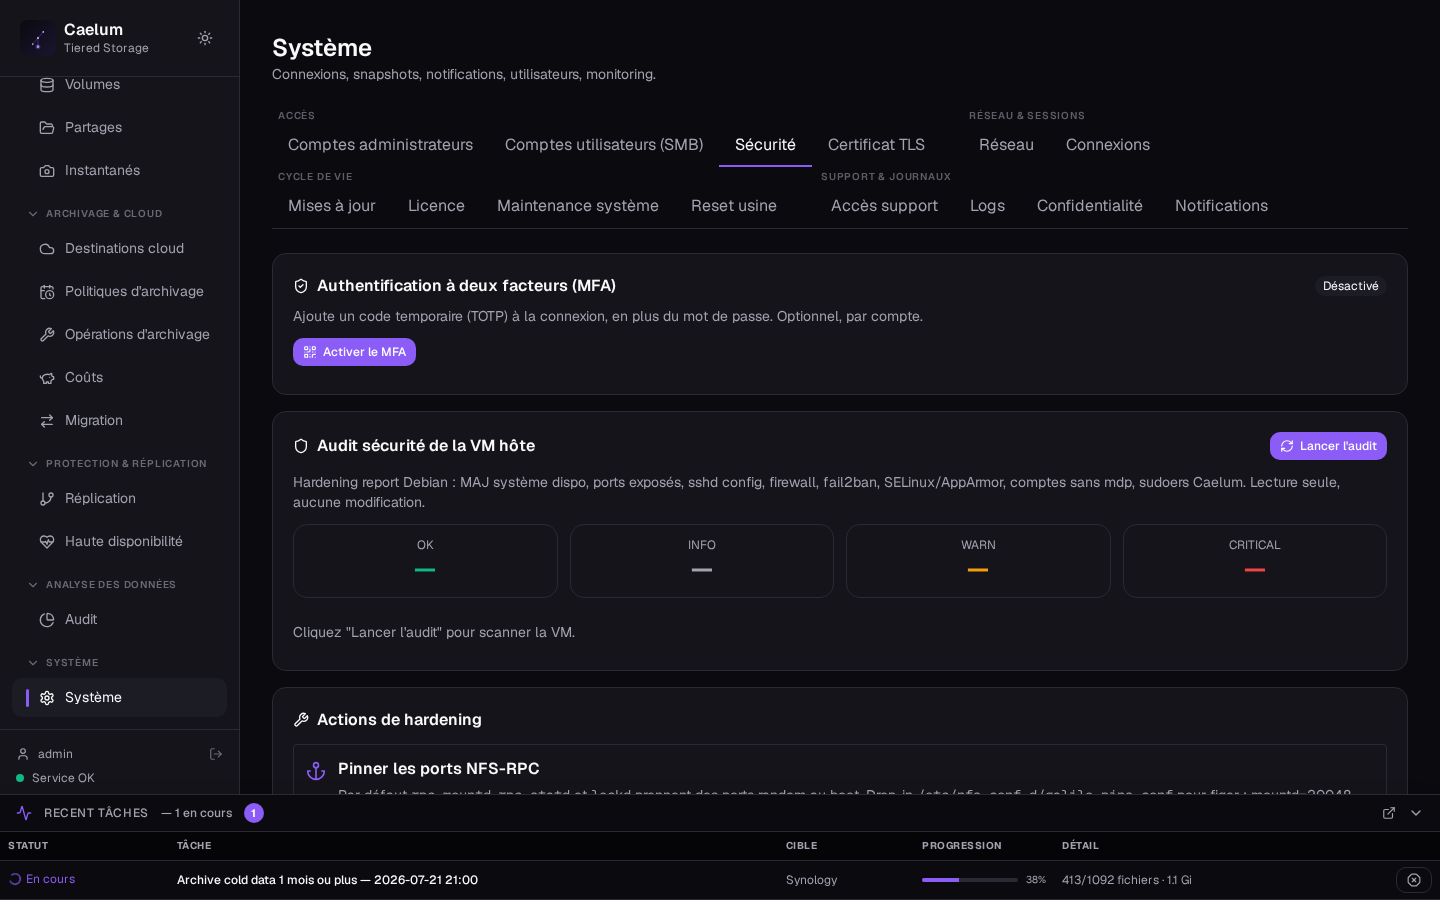
The Security screen gathers:
- Two-factor authentication (TOTP) for the signed-in account, with backup codes.
- A read-only Hardening audit of the appliance (system updates, exposed ports, SSH configuration, fail2ban, AppArmor, accounts without a password, sudoers). The local firewall is not shipped in this version: network filtering is done upstream of the appliance.
- API tokens: New token (Read-only scope by default, or Read and write); the secret is shown only once, at creation. A revoked token stays listed, marked revoked.
- Open sessions and Global quotas per user/group.
TLS certificate#
The TLS screen shows the certificate actually served by the appliance. By default a self-signed certificate is used (hence the browser warning); it covers the host name, the FQDN and the IP, and can be recreated (Regenerate self-signed). You can:
- Obtain a trusted certificate (ACME): Let's Encrypt, or an enterprise CA with EAB. Port 443 must be reachable from the Internet under that name; renewal is automatic.
- Import a certificate signed by your authority, or generate a signing request (CSR) from the appliance — the private key then never leaves the machine.
Advanced settings and privacy#
The Advanced settings screen gathers the settings that apply to the whole appliance: NFS engine (NFS-Ganesha or kernel; switching is global and interrupts NFS clients), partial streaming (NFS) state, minimum SMB protocol, S3 upload concurrency, local storage cost, time servers (NTP — a skewed clock breaks AD authentication), pin NFS ports, alerts and email, AI assistant settings and appliance location.
The Privacy section (System › Privacy) controls telemetry. It is enabled by default, on the basis of legitimate interest in tracking versions so security fixes can be shipped. Sending is daily. The data are pseudonymous and linked to the licence: installation_id, version, hypervisor, licence type and number, counters of shares, files, volumes and SMB users, high-availability indicator, and first-installation date. The hostname is sent only if the administrator has checked it. Sending can be disabled at any time in System › Privacy.
License#
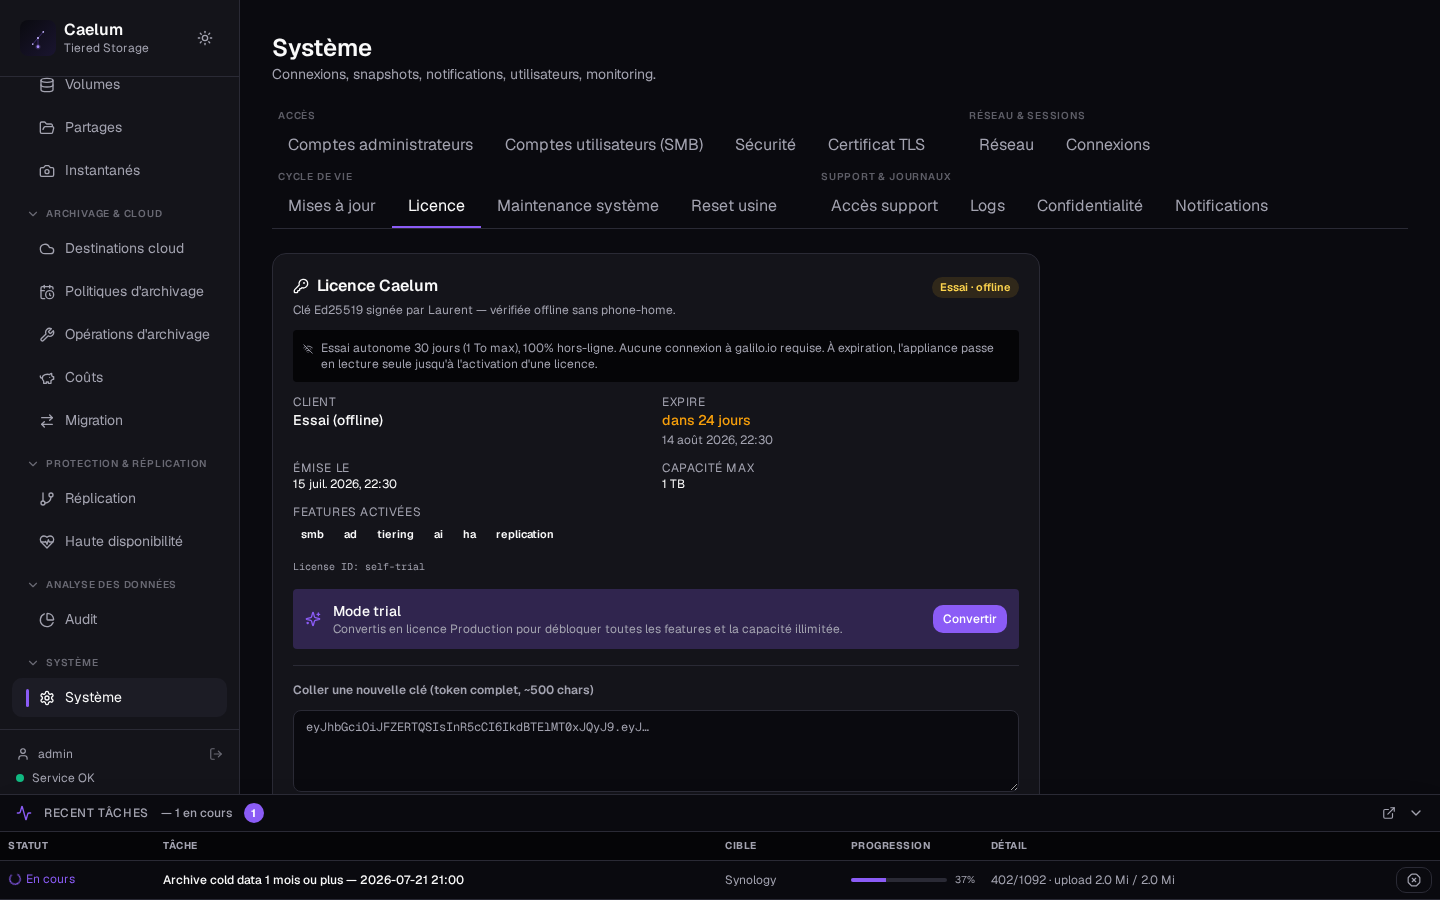
The License screen shows the active license (verified offline): state (Valid licence or not), type (Free / Trial / Production / NFR), identifier, issue and expiry dates, support level, maximum capacity and enabled features (SMB sharing, Active Directory, cloud tiering, AI assistant, high availability, replication, activity trail / audit). A new appliance starts with a 30-day trial, local and without Internet ("Essai (offline)"). Install a license asks for the license token; the licenses of your portal account can also be activated from Support → Licences on the account. Remove returns the appliance to its default rights, without touching data. These kind names are technical access categories for a non-commercial pre-release, not a subscription or paid offer.
Updates and rollback#
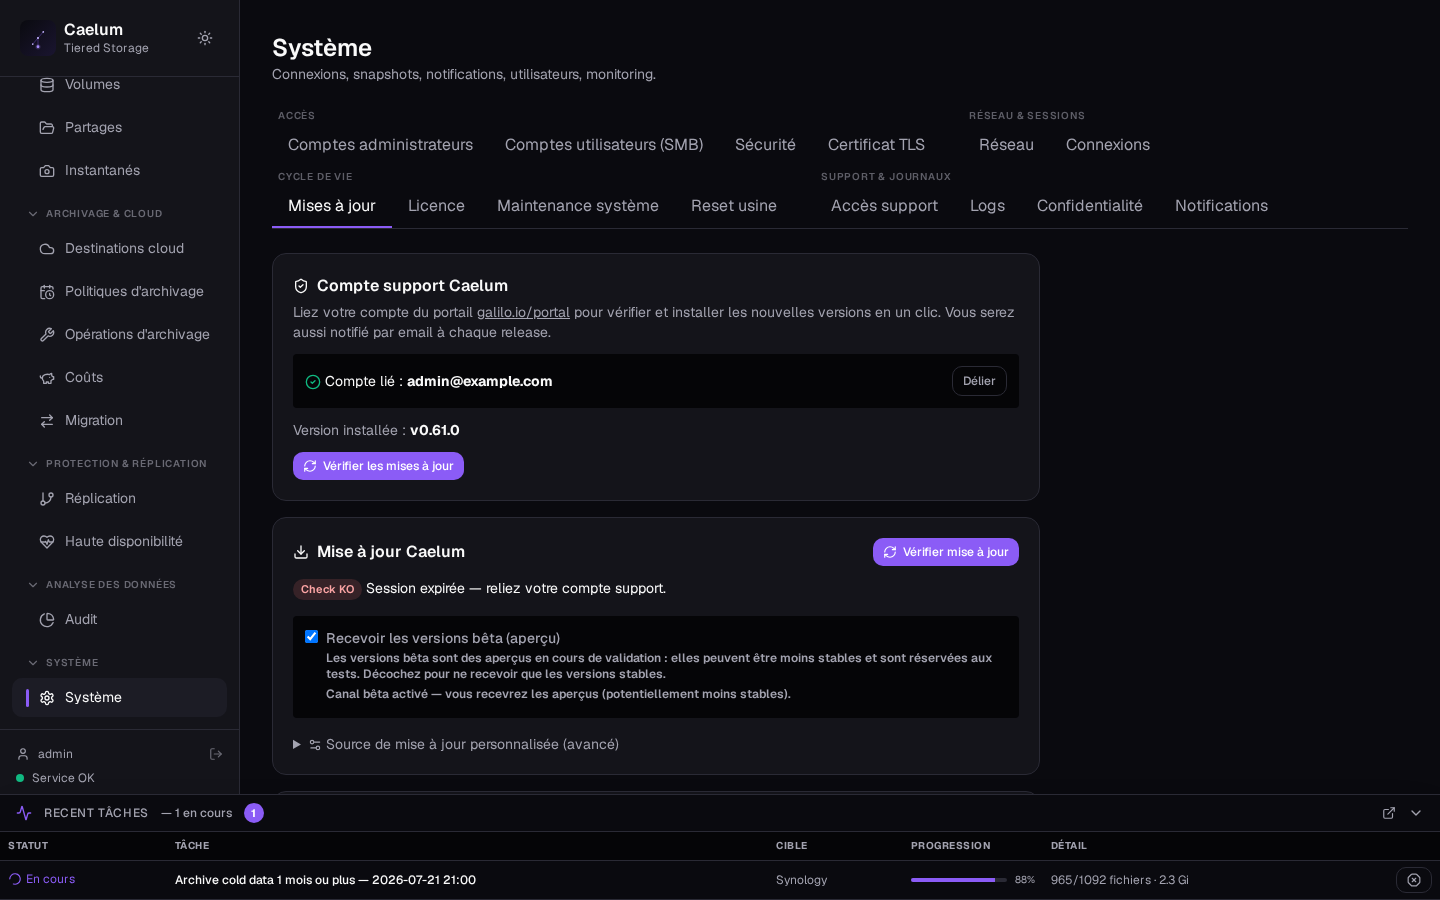
The Updates screen manages software updates (data is not touched):
- Release channel: stable (default, recommended in production) or beta (release candidates, for a test environment). An installed
-rcversion automatically switches the effective channel to beta. - One-click update: first link your portal account in Diagnostics → Support → Link an account. The screen then shows Update available: vX.Y.Z; the Installer vX.Y.Z button (labelled in French in this version) opens a confirmation: a system snapshot is taken before installing, then the interface restarts. Check again reruns the check.
- Install from a file (no Internet): choose the
galilo-update-*.tar.gzarchive (or.tar) and its.sigsignature file, which is required; the archive is analysed before anything is applied. - Rollback: to undo an update, use Code versions → Roll back to vX.Y.Z: the appliance switches back to the previous version and your data is kept. Rollback points lists the data pool snapshots taken before each update (Roll back, Keep only the 3 most recent): restoring one erases everything written since, on every share, and does not change the code version. Keep it for the case where the update damaged data.
Maintenance#
The Maintenance screen gathers the support bundle (diagnostic archive, secrets masked), the update snapshots, machine actions (Restart, Shut down), the configuration backup (no data, secrets not included in clear text), rebuilding the archived versions index and the purge of orphaned cloud objects (old versions of a modified file after 7 days, files deleted longer ago than the retention; Dry run then Purge for real).
See also: the tasks guide (step-by-step procedures), the replication guide and the installation guide.